
Photo: joshi5901 via Reddi
The Z seam (Seam) is a visible line of imperfections running down the side of the part you are printing. With Cura Z, stitches can no longer exist! Read on to learn how.
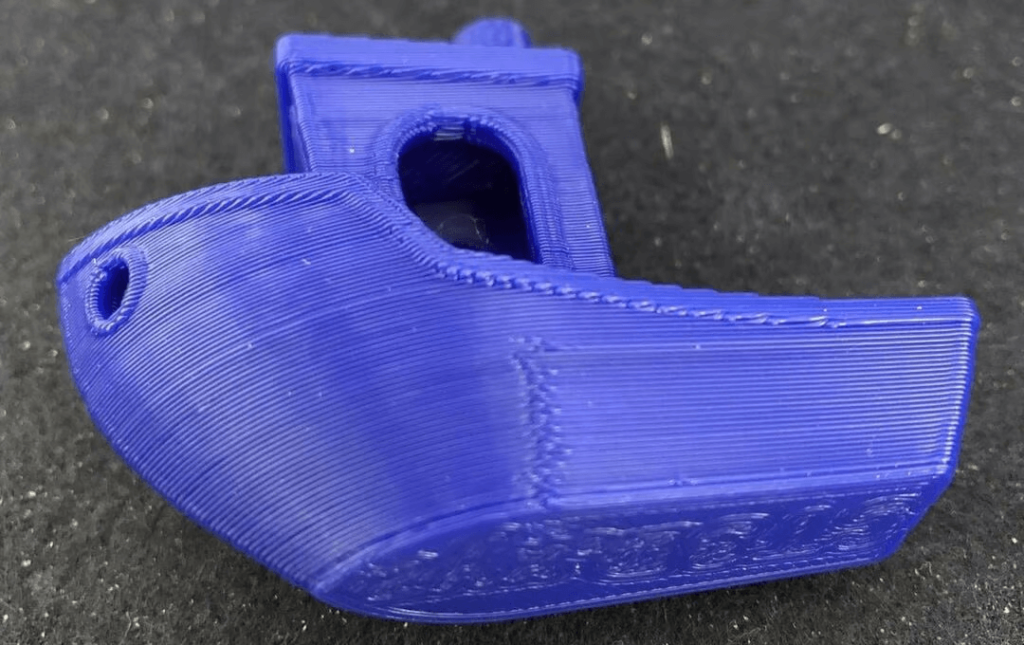
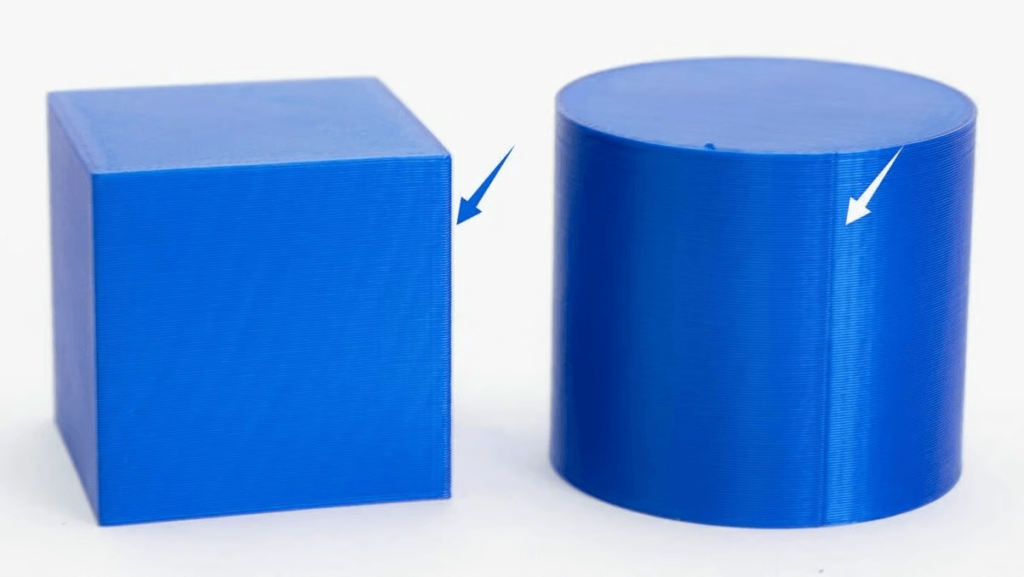
Anytime you've printed an object with smooth sides (not in vase mode), you may have noticed uneven alignment on the sides of your print. Although this phenomenon is sometimes mistakenly called spots or pimples, it is more correctly known as a Z seam. A Z stitch usually looks like a single line spanning the entire Z-axis of your model.
A Z seam exists on most 3D prints. However, the visibility and severity of the seam can vary depending on several different factors, including the size and shape of the model. The bump line is perhaps most noticeable on tall and round objects. This is because a taller part will automatically have a longer seam, and the smooth wall of a round part makes the seam more visible.
While the Z seam doesn't necessarily affect the functionality of a piece, it can still be annoying, especially when printing exhibits like a vase or a cosplay piece. Fortunately, there are several solutions that can help reduce the visibility of the Z seam on your prints. In this article, we'll look at what causes a Z seam, how you can possibly prevent it, and a few Cura settings you can use to control and hide the Z seam.
Reasons
The Z seam is caused by the extrusion at the beginning or end of each layer (Source: heijmenberg via Reddit )
As mentioned, Z stitching is a print quality problem that exists in essentially every print, but its severity depends on many factors. Let's take a closer look at the extrusion process.
A Z seam is formed during the time it takes the print head, specifically the nozzle, to move to the next layer. Just before this jump, extrusion is stopped and the printhead stops moving for a split second while the Z-axis stepper motors lift it to the next layer.
During this pause, excess thread may flow out of the nozzle. This unwanted extrusion occurs due to a build-up of pressure at the hot end during printing. When the extruder stops briefly, this pressure is released, causing a small flow of material from the nozzle. The excess material sticks to the impression at the pause, creating the unevenness of the Z seam.
As for bump alignment, that problem is in the hands of the slicer. Most slicers automatically set the start point of the next layer directly above the end point of the previous layer, so the bumps line up to create a very visible Z seam.
Although this alignment may sound easy to avoid, placing the start and end points in the same place is most efficient and helps limit print time. Also, moving the start point does not eliminate the built-up pressure, so moving across the print to start the next layer at a new location can cause prints to string.
Note for UltiMaker Cura 5.3
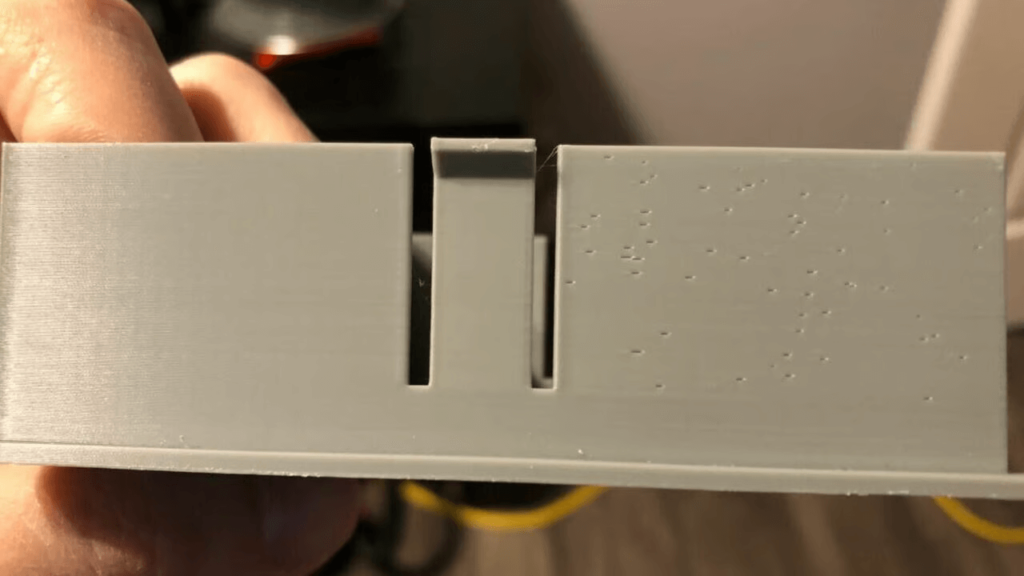
Some users have reported experiencing strange slicing artifacts appearing on curved print surfaces as random Z-seam blobs after updating Cura to 5.3.0 or 5.3.1. Fortunately, the developers received feedback from the community about this and identified the issue.
The issue appears to have been resolved and no similar issues have been mentioned for UltiMaker Cura version 5.7 (the latest at the time of writing). In any case, if you encounter such artifacts in later versions, try rolling back to Cura 5.2 or earlier versions if you suspect you're experiencing this problem and there's no news on how it might have been caused.
Prevention

Calibrating your E-steps can improve extrusion (Source: m3tolli via Reddit )
There are two ways to deal with the Z seam: prevent it and hide it. To prevent printing problems, you must identify and correct the source of the problem, which in the case of the Z seam is pressure at the hot end that releases excess material onto the print.
This pressure is the result of imperfect extrusions during the printing process and preventing it can be a challenging task. Ideally, you want to perfect your printer's extrusion by adjusting all the contributing factors.
Unfortunately, many different slicers, firmware, and mechanical considerations affect your machine's extrusion, so it can take a long time. Here are some extrusion calibration techniques as well as other features that can help prevent hot end pressure:
- Calibrate your extruder / Calibrate your extruder (E-steps): Calibrating your extruder involves adjusting the E-steps to ensure that your extruder motor's extrusion is accurate. In other words, a calibrated extruder will ensure that when you extrude 10mm of filament, exactly 10mm goes into the hot end.
- Adjusting the flow rate/ Adjusting the flow rate: Flow rate, sometimes called extrusion multiplier, is another extrusion variable. The flow rate determines at what rate (usually a percentage) the filament will be extruded. It is best to set this value after you have already calibrated your extruder.
- Nozzle temperature/ Nozzle temperature: The temperature of the nozzle (or more precisely the hot end) is another critical factor in extrusion. The hotter the nozzle, the faster the material will melt and flow out. Too high a temperature often leads to over-extrusion, which can make the Z seam more noticeable.
- Printing speed/ Print speed: Print speed controls how fast the nozzle moves. Lower print speeds allow more time to extrude the filament and help limit hot end pressure.
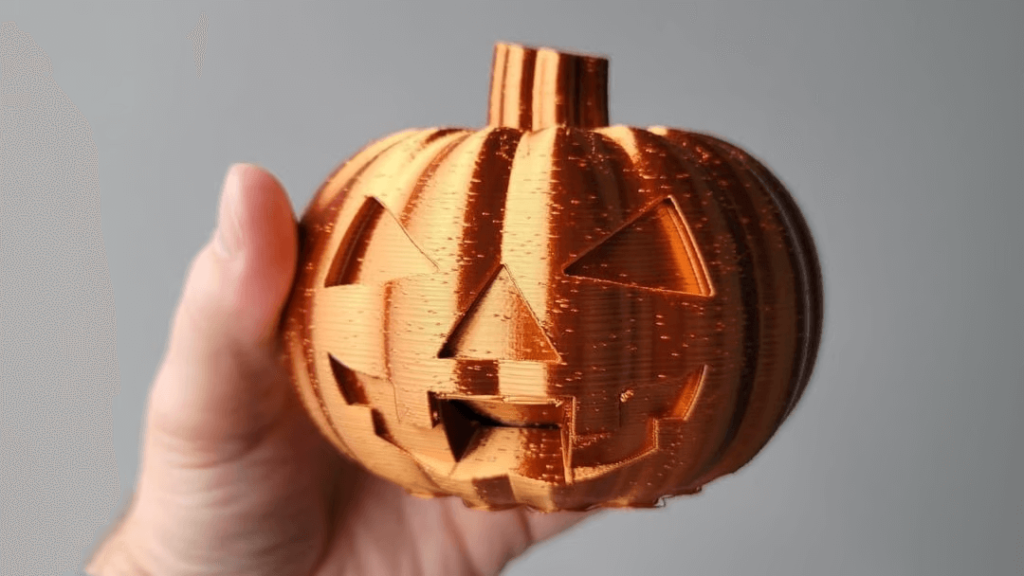
Too much inertia can lead to missing parts in the prints (Source: kuvalak via Prusa Research)
- Coastering: This is a function that tells your printer to stop actively extruding material, but to continue moving during the last part of the layer. Coastering implies that the pressure at the hot end will complete the extrusion of a layer for the nozzle. Although a little delay can help, make sure you don't set the momentum value too high or you may end up with small gaps on the prints when the material runs out before the end of the layer.
- Home/ Retraction: Retraction is a print feature that can be enabled on your 3D slicer that tells your printer, specifically the extruder, to retract the filament from the hot end at the end of the die stroke. Pulling the filament back relieves the pressure on the hot end when the nozzle is paused, but too much retracting can cause the nozzle to clog. This setting can help prevent Z seams as well as reduce stringing in prints.
- Collapse on layer change/ Retraction at layer change: Apart from the overall zoom, Zoom on Layer Change is a setting that can be enabled, as its name suggests, zooming in when the hot end moves to the next layer. Although it may increase print time and may produce undesirable results if the retract distance is large, this is one of the first settings to enable if the Z seam is a problem.
- Wiping/ Wipe: Wiping is another function of the slicer and requires a different approach to relieving pressure on the hot end than retracting. Instead of reversing the extrusion to relieve pressure, wiping allows the hot end to relieve pressure from the printed pattern. This feature tells your printer to move to the side briefly after completing a layer to relieve pressure on the hot end before moving on to the next layer.
- Line Overtaking/ Linear advance: Finally, linear advance is a firmware feature that, like coasting, adjusts for predicted hot-end pressure. This feature does not actually prevent pressure, but uses pressure along with a set compression value (K) to keep the extrusion constant with the print speed.
Slicer settings
Accidentally lining up the Z seam doesn't prevent the problem, it spreads it (Source: b3p4u via Reddit )
If you're like many users and don't want to go through the time-consuming and difficult process of avoiding hot end pressure, or have already changed the settings but still have a visible Z seam, then hiding the seam may be a better solution for you. The easiest way to hide or reduce the Z seam effect is by using the slicer settings; we will look at some of the most important and relevant ones available in UltiMaker Cura.
Z Stitch alignment/ Z Seam Alignment
These settings options control how the inevitable unevenness of the Z seams will be aligned. There are four options available:
- Specified by the user/ User Specified/ allows you to manually control where the Z stitch will be placed. When selected, you will be able to choose from some preset options (eg "Back Right") or set X and Y axis coordinates. It may also help to enable the "Relative Z Stitch" option to make the coordinates for manual input relative to the center of the part.
- Shortest /Shortest/ sets the starting point closest to the nozzle when it finishes the previous layer. As you might expect, this option gives a straight line of bumps, so if you want to cover up the Z seam, this is not the setting to choose!
- Random /Random/ , as the name suggests, sets the start points of each layer to an arbitrary location. Although the 'Arbitrary' option prevents a rectilinear Z seam, it can still result in visible blobs, just at different points.
- Acute angle /Sharpest Corner/ selects the sharpest angle to place a Z seam. The corners are great for hiding the Z seam because the seam almost blends into the top.
Seam Corner Preference
Placing the seam in the corners will be much less visible (Source: Prusa Research)
These options control how a corner is selected if it should be selected as the start point of a layer. This setting also contains several options:
- None /None/ tells your slicer not to make special preferences when choosing the starting point of a layer. (Don't worry, if you use the Sharpest Corner setting for Z Stitch Alignment, the sharpest corner will still be selected as the starting point.)
- Hide seam /Hide Seam/ places the seam on the inside corners of your pattern. With the seam in the innermost corners of the model shell, it should theoretically be much less visible.
- Seam Reveal /Expose Seam/ is the exact opposite of the previous one and places the stitch on the outermost corners. This sounds like it looks more visible, but may be preferable depending on the model.
- Hide or show a stitch /Hide or Expose Seam/ tells your printer to use either the innermost or outermost corner as the starting point.
- The smart hide /Smart Hiding / is similar to the previous one, but tries to pick the innermost corners as much as practically possible, but still allows the outermost corner to be picked.
Spiral the outer contour/ Spiralize Outer Contour
Located under Special Modes, this next setting is known as vase mode and smooths out the Z-axis jump by making the jump gradual and never stopping nozzle movement until the end of the print. The result is faster printing for single-layer objects and significantly less visible Z-seam. This setting has one sub-setting:
- Smooth spiral contours/ Smooth Spiralized Contours is only available when "Spiralize Outer Contour" is enabled. It makes the print movement in vase mode smooth to further limit the Z seam effect.
0 Comments