Waterproof 3D printing is easier to achieve than you think. Read on for tips on material, slicer settings, and post-processing!
Although 3D printed parts have many advantages, they are usually not waterproof. Taking the time to waterproof your parts can make them last longer and protect them from water damage. Plus, it only takes a few simple steps.
Many people have misconceptions about what "waterproof" means, so let's get that straight right away. Basically, there are waterproof and waterproof, and they are different. Waterproof means that water cannot penetrate into (and through) the part, while impervious means that water can neither enter nor leave the part. In practice, you may want the printout to be waterproof if it will be exposed to rain or humid climates. Whether it holds water without flowing is irrelevant.
For example, if you're 3D printing a part of a car (say, a piece of bumper), you don't need to make it waterproof, but it needs to be waterproof to make sure it can withstand repeated exposure to rain. On the other hand, if you are printing a water bottle, it must be waterproof to hold liquid.
In this article we will focus on how to waterproof your 3D printed parts. We'll show you some different methods, including material selection, slicer settings, post-processing and testing. Let's start!
Choice of material
Some materials are more vulnerable to chemical reactions and deformation than others, which can result in non-waterproof parts. If a material is water reactive, a 3D print made from that material will most likely deform when it comes into contact with water or is placed in a humid environment. So the choice of material should be your first consideration.
Just remember that this is not the only step. While some materials may be labeled as waterproof, parts made from them may not be.
Materials
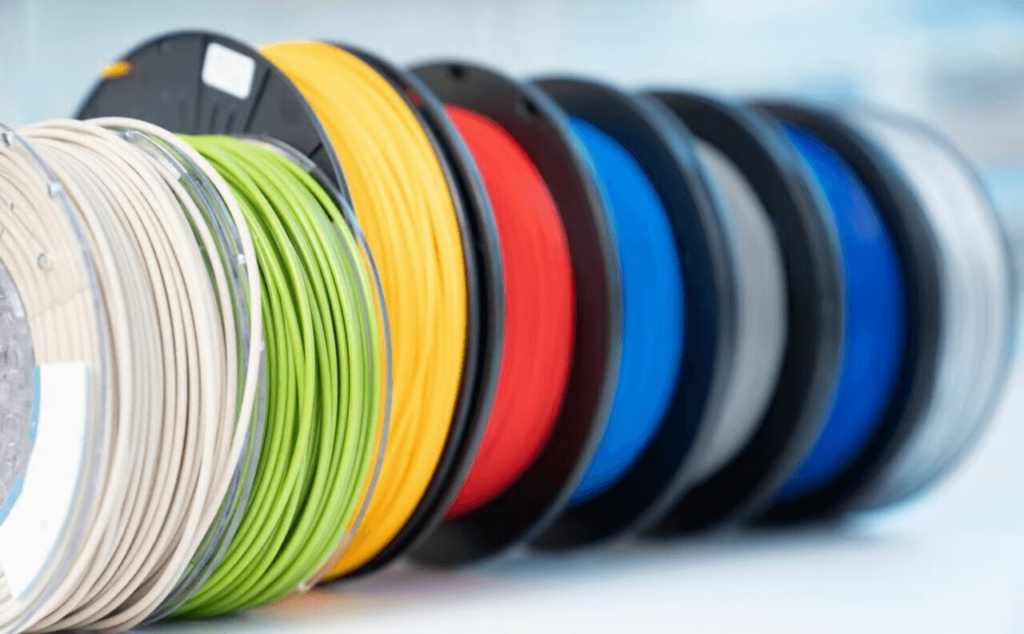
If you're printing with FDM, you'll likely be considering three main materials: PLA , ABS , and PETG . Although less common, polypropylene (PP) is another material to consider due to its waterproof capabilities. Let's take a closer look at all of them.
- PLA not known as the most waterproof material, but it gets the job done. It should work fine as long as it interacts with cold water and not hot water.
- ABS is an excellent material for waterproof printing. Parts can crack and warp when exposed to cold, but its waterproof properties are reported to otherwise last for extended periods of time.
- PETG , a modification of PET (which is used in water bottles), is a great material for making waterproof prints. PETG is generally considered waterproof and also has excellent thermal resistance. This material is probably your best bet for printing waterproof parts as long as you perform other waterproofing techniques in addition.
- PP is one of the best options for waterproof prints. It is inherently hydrophobic, holds water well, and has good chemical and impact resistance.
Additional considerations
When choosing the right material for your situation, it's important to consider the conditions the part may be exposed to (and how often).
FOOD SAFETY
If you plan to use a 3D printed part for something that will come into contact with food or drink, you should use a food-safe material like PP or PETG, not ABS or ASA. Before printing, make sure that the manufacturer of the particular filament states that it is food safe.
HEAT RESISTANCE
Heat resistance has nothing to do with water resistance of a part, but depending on the intended application, it may be relevant. For example, dishwasher safe parts are exposed to extreme temperatures and lots of water, so material selection is particularly important. Make sure you choose a heat-resistant material that is also water-resistant, such as ABS or PETG.
UV RESISTANCE
Parts exposed to long periods of sunlight may fade in color and become brittle. Adding water can speed up this effect, so if you're planning to print objects for your garden or a bicycle accessory, it might be worth switching from PLA to a more resistant material like ASA.
Slicer settings

One of the most important factors for 3D prints is how they are cut and with what settings. Among other things, settings determine how dense, full and protected a 3D printed part is, which in turn can affect how waterproof it will be.
Just keep in mind that although slicer settings play a big role in making a 3D print waterproof, some models are more difficult to waterproof than others. Complex models with a lot of detail are more challenging, so be sure to make your model as simple as possible.
Once you've modified your model accordingly, it's time to play around with the print settings. Below are the most important ones to keep in mind.
Extrusion
Deliberately over-extruding your prints can make the parts more watertight as there is a reduced chance of gaps in your print. You can do this by increasing the extrusion multiplier, also sometimes called the "flow rate", in your slicer.
You'll also want the many layers of your print to adhere better to each other, and you can do this by increasing the temperature. Increasing the temperature can also help with overextrusion.
Shells and filling
You should increase the number of walls you use for printing. Adjusting this setting adds more of a border that surrounds the filled portion of the 3D print. Three shells is a good starting point, but this should be increased depending on the conditions it will be exposed to and the material you are using.
For example, if the part leaking water can cause damage to your other items, it's not a bad idea to increase the number of shells on the walls. If you choose a less resistant material like PLA, increasing the number of shells is more important than for a more resistant material like PP.
Additionally, consider using a higher fill rate. This will add more padding to your print, which can help preserve its structural integrity.
Nozzle size
While this is not a slicer setup per se, the larger nozzle can help make the parts more waterproof. A wider nozzle means thicker extruded lines, including part shells. Regardless of how many they are, thicker shells mean less chance during printing that they will accidentally print thin enough to form holes or gaps. Of course, with or without a thicker nozzle, more shells can only help the waterproofness of the print.
Layer height
Using a lower layer height setting can improve the water resistance of the print because it creates more tightly packed layers that are better at holding water. Smaller layer heights can also result in improved layer adhesion, so even if it takes a little longer to print, you'll end up with an object less prone to cracking and leaking.
Subsequent processing
Post-processing is one of the best ways to make a 3D printed part waterproof. Smoothing the layer, in particular, can produce great waterproof results. It blends layers, eliminating layer line gaps and creating a tighter seal around the part.
Smoothing the layer can be done in several different ways, but the basic technique is to apply a solvent to a soluble print. Some materials are soluble in certain chemicals. ABS is partially dissolved in acetone, for example.
- Acetone: This is probably the most popular solvent used for post-processing. Acetone vapor embossing works with ABS, ASA, HIPS, PMMA and polycarbonate filaments.
- Epoxy resin: Another post-processing method is to cover an impression with epoxy resin. Epoxy quickly smooths layer lines on 3D prints, making parts less vulnerable to water.
- Wax: Although less common, wax is a good candidate for waterproof impressions. It doesn't dissolve layers like acetone does. Rather, it fills all the gaps between the layers.
Testing
Now that you've created a waterproof part, it's a good idea to test it. Don't immediately assume that by following the recommendations above you will always have a waterproof part.
Testing your print can be a bit tricky and can also depend on the geometry of your design. If the piece can hold a cup or so of water (whether that's the intended purpose or not), try filling it with water and marking exactly where the waterline sits. Be sure to keep the piece in a cool, shady spot and monitor it over the next day to see if the water line drops significantly. If so, you have a water leak.
If your portion does not hold water, place it on a scale and record the dry weight. Then let the part soak in a water bath for a day. Then thoroughly dry the surface of the workpiece and weigh it again. If your part is much heavier now than it was a day ago, it probably has water in it.
If your part doesn't turn out to be waterproof, we suggest revisiting the recommendations above: Adjust your slicer settings, apply a uniform epoxy sealer or other post-treatment methods, or possibly use a completely different material.
You may also have a printing problem, so be sure to check that all the systems on your 3D printer are working smoothly.
0 Comments