3D printing of hollow objects can save you money, materials and time. Learn when and how to carve 3D objects with three easy methods.
In a nutshell, printing hollow objects can be reduced to using 0% fill in your print settings. However, depending on the printing method, print settings, or design method, more should often be considered when printing hollow objects.
For example, a model can now be designed hollow, in which case printing at 100% fill would only mean solid walls. Or the model can be designed tightly and with the help of 0% filling and a certain wall thickness a very similar result can be achieved.
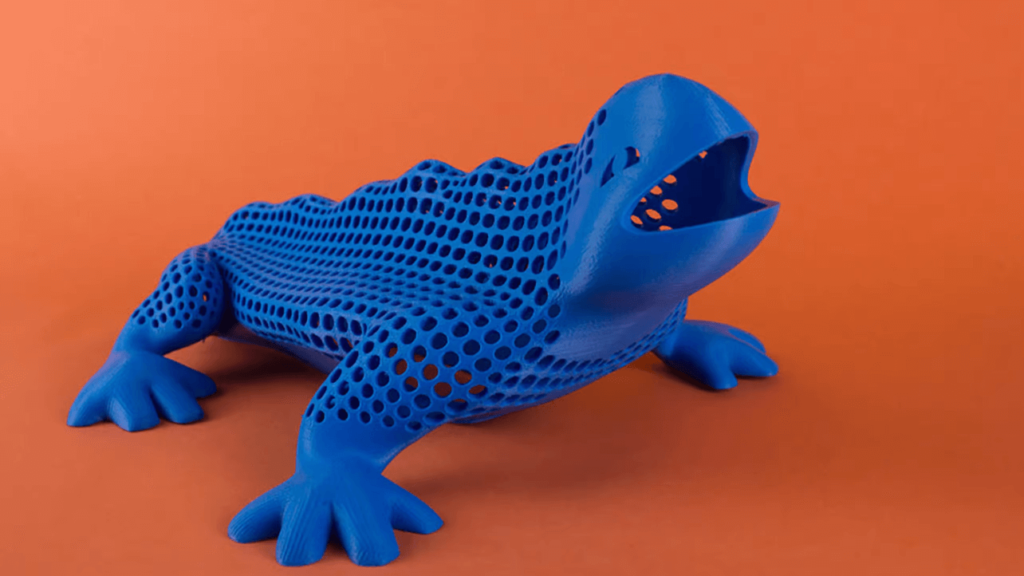
Of course, printing hollow objects can save material and printing time, for example when printing models such as figurines, which should not be strong. It can also be useful for achieving a certain transparency, so that when LED lights are placed inside, it lights up. And it may even be necessary when you need your design to be light or when you want to swim - a hollow object will float easier than a hard one.
There are many ways to play with hollow printing: You can design a hollow object and print it as it is, you can design a solid object and print it hollow, or you can design a solid object and use templates to reduce its mass. . In addition, the techniques also depend on the printing technology used: FDM or SLA.
In this article we will cover all these possibilities, but before we do, let's look at a few aspects of printing hollow designs.
Considerations
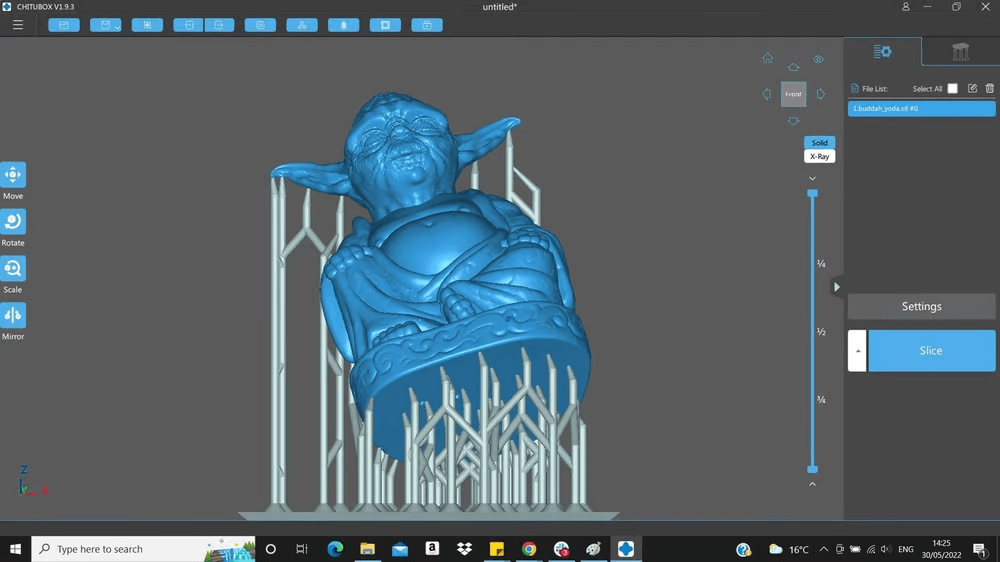
All3DP; Yoda Buddha: tamraz through Thingiverse)
In addition to the print settings, there are other aspects to keep in mind in your design before, after, and during the printing process.
RESIN AGAINST FDM
When printing with resin (including methods such as SLA or DLP), printing hollow objects is the norm. Meanwhile, in FDM it is more common to see variations between some percentage of filling and printing the design completely hollow.
RESIN DESIGN
During the 3D resin printing process, the printing bed is immersed in the liquid resin and thus, while the model is printing, the liquid resin can be kept inside. It is good practice to add drainage holes to allow the uncured resin to come out and to avoid a pressure difference between the inside and outside of the impression.
DESIGN LIMITATIONS
The filling can serve as an internal support, so the presence of filling helps certain curves, such as overhangs, to occur in the printing process without any problems. Printing certain shapes or angles can be difficult when printing hollow objects and can interfere with the quality of the surface or even affect which shapes are possible. A good strategy may be to rotate the model to find an angle that works. So think of the filling as a support and imagine if this model will need supports for different parts. If the answer is yes, no matter how you rotate the design, hollow printing may not be the best choice. For example, with an increasing curve like an arch, you will not need supports (filling), except in wide arches, where the supports become necessary, where it essentially becomes a problem. Similarly, with drastic changes such as the top wall of a cube, a lack of filling would lead to poor bonding.
SHELL THICKNESS
In accordance with the previous point, the presence of a hollow object with a thin shell can also contribute to poor surface coverage, can affect the shape and can make the parts look detached, so in some cases you may need to or increase the thickness on the wall or use a low-density filler so that you can join the separated parts.
POWER
The strength of your model depends on both the density of the filling and the thickness of the wall, which makes certain objects unsuitable for hollow printing. Similarly, if you are printing an object with 0% fill, it may be a good idea to consider thickening the shell to increase its durability.
Before we look at the specific settings in slicers, let's look at the different ways to achieve hollow designs.
Design methods
Printing hollow objects goes beyond simply setting up printing at 0% fill. The process actually starts before that - in the design. Both go hand in hand, and depending on how you design the object, this can affect the way you print it - and depending on how you plan to print, your design may be affected.
Method 1: rigid model - hollow settings
Instead of taking the time to model a hollow object, you can model a solid object and make it hollow - simply by using the print settings in your slicer. This method can be used for figurines or other models downloaded from repositories, but you can also keep this process in mind when designing your own models.
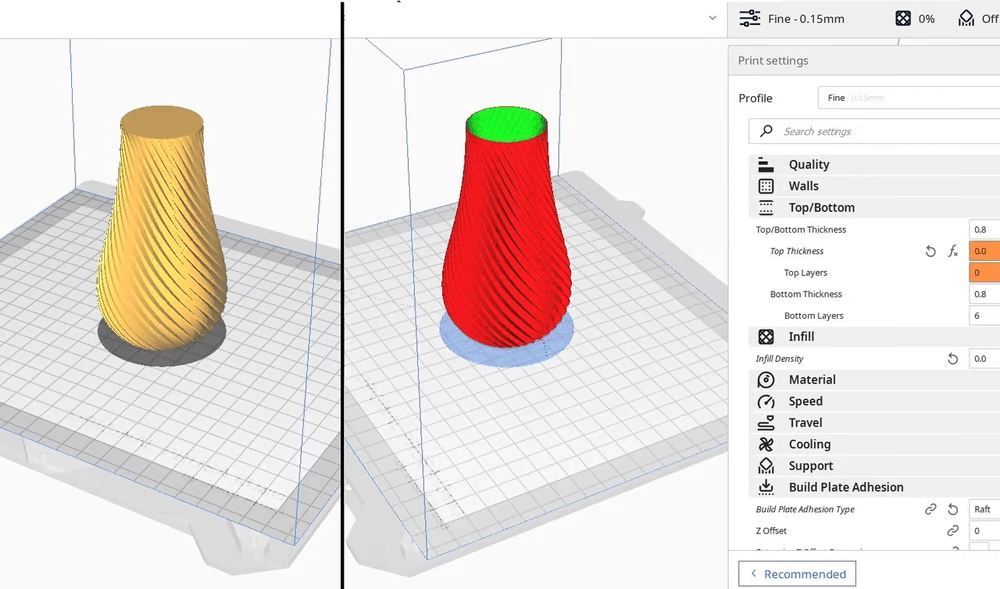
For example, if you design a vase with this method, the design will be completely solid, but the real changes are happening in the print settings. You can remove the top layers, use 0% filling and set it to have a thick shell. This is a good example of how hollow printing can affect the design process and actually save you design time.
The vase is a special case because you do not have an upper structure to close, but you can still apply this method to other shapes, such as action figures, without removing the upper part. In such cases, you simply set the fill to 0%, as long as the overhangs are incremental and have a thick enough shell to support the next layers.
Method 2: Hollow model - tight settings
Unlike the first method, you can also take the time to make the design hollow, which means you can have a thicker wall, and in your printer settings the fill percentage will refer to the filling inside those walls, in which case must be more than 0%. This object is also a hollow object, though the imprint technically not a hollow imprint.
Keep in mind that having a tight shell in which all lines are parallel to each other, unlike walls with filler inside, will change the mechanical properties of your print (puncture quality, torsion resistance, axial resistance, bending resistance and etc.) because how the material deforms when subjected to stress will depend on the geometry and the bonding forces between the layers.
Method 3: Patterned walls - tight settings

In the history of architecture, they teach that the old buildings were mostly walls with very small windows and this was the technique used to keep the buildings (mainly churches) upright. Then they realize that columns support loads just as effectively, and walls can become more decorative.
Something similar can be applied when designing for 3D printing. When using, for example, a hive filling model, these lines can be considered as shells and pearls of the structure, but the outer wall is still attached to them and is still strong.
A different design method is the purposeful design of walls, taking into account the structural elements, similar to what you see in bridges. In this way, the print settings are not technically hollow, but the design is and can have incredible advantages in the presentation of geometry and material. It can reduce vibration in the model and increase the maximum load it can withstand, among other things. Although you could use this method for action figures, for example, it will make the character unrecognizable; however, it can be made with vases, boxes, spheres and any other decorative or structural print.
And now we will focus on the recommended workflow for printing hollow objects with the help of various separation programs and in terms of FDM printing.
In case you're not very familiar, FDM is short for Fused Deposition Modeling, which basically means partially melting plastic (usually a spool of thread), making it more flexible and depositing this soft material in a certain position, layer layer by layer to create volume. As the material is partially melted, the layers adhere to each other without glue.
We will focus on Cura and Simplify3D, as they are two of the most popular sliders, but if you have a different program, the settings should not differ too much.
Girl

There are several options when it comes to Cura, depending on your design and how much you want to touch with the print settings.
STANDARD SETTINGS
When you open Cura for the first time, you will see the recommended print settings on the right. The easiest way to print a hollow object is to drag the fill setting (infill ) on 0%. However, there are additional parameters that you can adjust, such as the thickness of the outer shell, supports and edges, and to access them you need to click "Custom" in the print settings.
PERSONALIZED SETTINGS
- Among the custom settings options, you can find a category called "Walls". There you can determine the wall thickness in mm. This value will automatically be rounded to the nearest multiple of the line width of the outer wall (found in the "Quality" category), which will be the number of lines deposited.
- Alternatively, you can directly set the number of lines with "Wall Line Count", which overrides the wall thickness setting.
- The next category is "Top / Bottom" and you can set the thickness of the top and bottom layers using the same method as above.
- In the case of the vase, for the upper layers, the value will be 0. This will vary depending on the model - such as a figurine or design that requires a closed top.
- Finally, in the category called "Infill", you would set it to 0%.
You can save these print settings by clicking the "Profile" drop-down menu. Here you will see a display of the different profile options. Then select “Create profile from current settings / overrides”, which will create a print setting with the current settings.
Cura (alternative method)
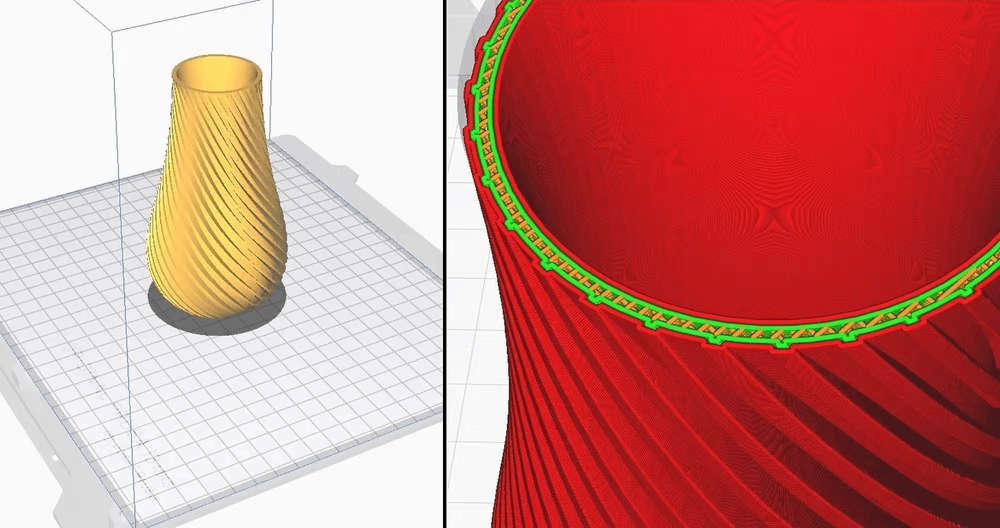
This procedure consists of using Cura's "vase mode" tool. While the vase mode is (of course) great for printing vases, it can also be useful for sculptures, rockets or containers.
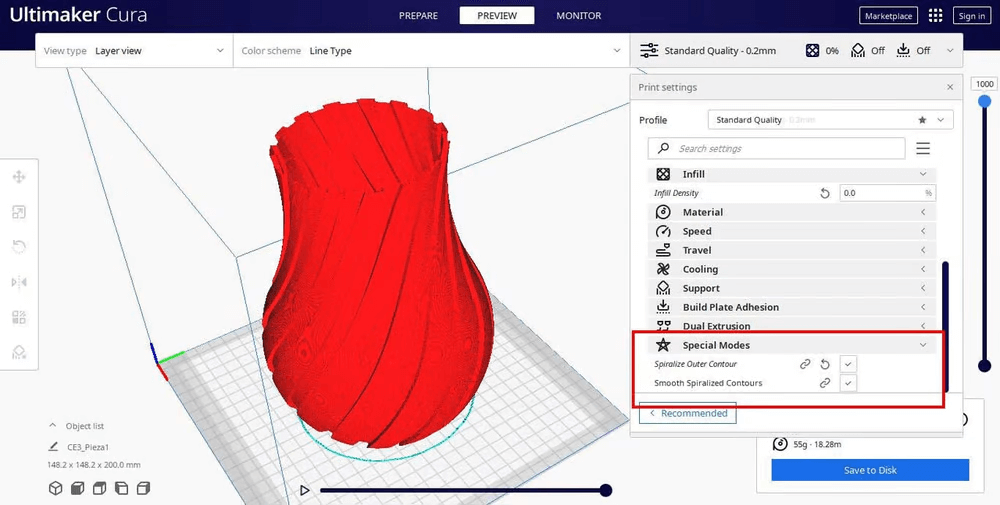
Keep in mind that "vase mode" is just a popular name used by the community (because it works especially well for vases). The Cura is not called that. The settings we are looking for are actually called "Spiralize Outer Contour" and "Smooth Spiralized Contour".
What makes this method different from the previous one is that it overrides all other settings for print thickness and the like. It creates a hollow object without filling and only one line with the thickness of the shell. This last feature is something you should especially keep in mind if you want to print, for example, a vase. Depending on what you put inside, if you use this setting, the result may not be strong enough for what you want.
Similarly, you should take into account the geometry of your model, as some shapes may not be suitable for this mode of operation, which is mainly used for vases, as their geometry tends to have curves that increase very slowly.
To activate this setting:
- Load your model in Cura.
- Open custom print settings.
- Select "Special Modes" and a menu will appear.
- Special mode options are not displayed by default, so if you are using them for the first time, you will first need to activate them in the "Setting Visibility" menu.
- Open the full list of settings and activate it together with the "Spiralize Outer Contour" and "Smooth Spiralized Contour" options. You can access the full list of settings by holding the mouse cursor over the name of the Special Modes section and a menu toggle icon will appear. Select it and the Settings Preferences window will open.
- The options will now appear in the menu, but they have not yet been selected.
- Activate the "Spiralize Outer Contour" and "Smooth Spiralized Contour" options.
- Cut the model and you are ready for 3D printing! It's so simple.
Simplify3D
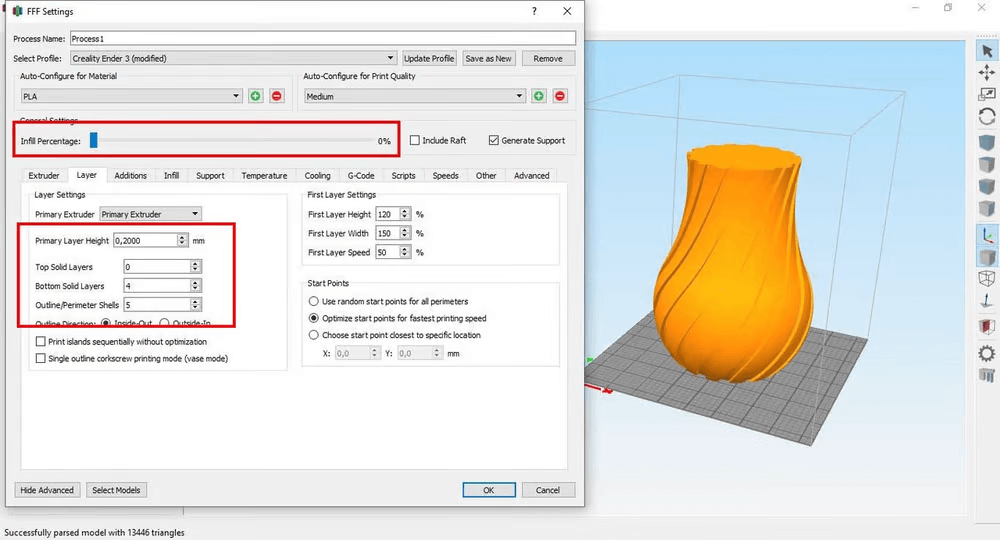
Like Cura, when using Simplify3D, all you have to do is set the filling to zero and adjust the wall thickness to your liking.
- Go to the processes window and double-click on the process.
- If you're in the default print settings, just drag the fill bar to zero, and that's all you could do there.
- To further customize your print settings, you can click "Show Advanced" and go to the "Layer" tab, you can change the number of upper solid layers, lower solid layers and the shell.
- To calculate your layers in mm, use the method already explained in the first method.
It is! But if you still have questions or concerns, please do not hesitate to contact us from 3MG Bonev Ltd. to help you! Good luck with printing hollow objects!
0 Comments