Cura's Adaptive Layer feature uses different layer heights to achieve increased detail while reducing print time. Read on to learn more!
One of the most important separation settings for a 3D printer is the layer height, which determines the distance of each layer that makes up a model. Higher layer heights mean thicker layers that give stronger prints in less time. Conversely, the lower layer height provides more detail for printing on the model (eg small elements), but the models are weaker and take more time due to the increased number of layers used.
The setting for adaptive layers in Ultimaker Girl , the most popular cutting program for FDM 3D printers, allows layer heights to vary within a single print. In this article we will look at how adaptive layers work and discuss the advantages and all the disadvantages of the feature. We will also review the various settings related to the Adaptive Layers feature in Cura and how you can adjust them.
Why they are useful
One problem that can arise when using a constant layer height is that the top can be "cut short" if the value of the model height is not divided by the defined layer height. As such, the 1.1 mm high model will be printed with five 0.2 mm layers, as most 3D cropping programs will round (usually rounded down).
Adaptive layers are useful for 3D printing, as it is not always advantageous to use the same layer height throughout printing. The feature was first released in Cura in 2017 and has been improved since then, so you can now control more aspects of how it works. There are similar features in other cutting programs, such as the variable layer height settings in PrusaSlicer.
The most obvious advantage of adaptive layers is that they can ensure that prints are more accurate and precise, as the Cura will not have to round up or down the number of layers used for printing. Unplanned printing can also be used to prevent height reduction. This process uses layers that span 3D space (not just the X and Y axes) and can also improve the accuracy of details, but is more complex to set up and cannot always be used.
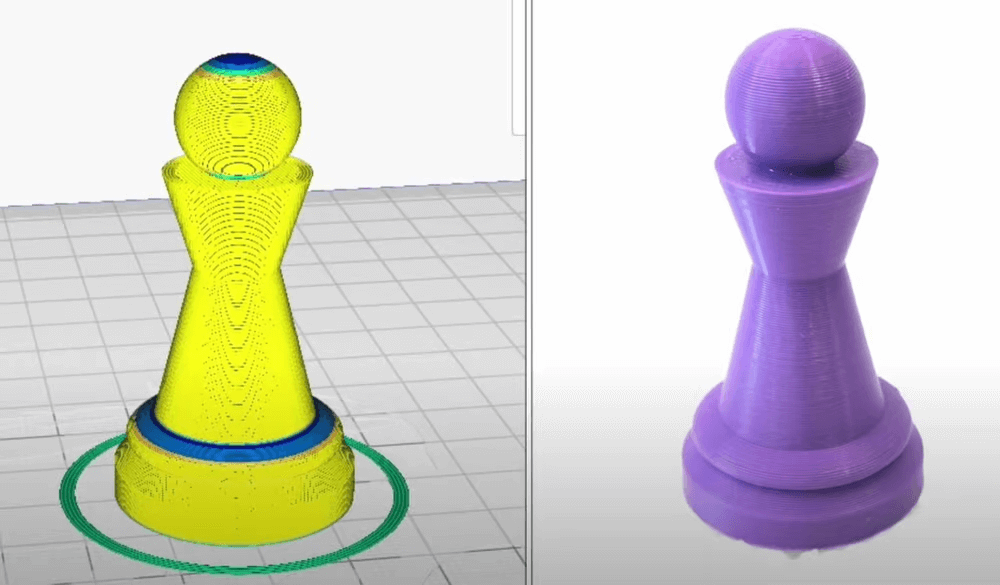
In addition, the Adaptive Layers feature will use a lower or higher layer height when it's best for the model, so you don't have to choose whether you want strong or detailed printing. For example, suppose you print a lamp post. The adaptive layer setting will tell your slicer to use a larger layer height for the model shaft and a smaller layer height for the more detailed area of the lampshade to capture all the details.
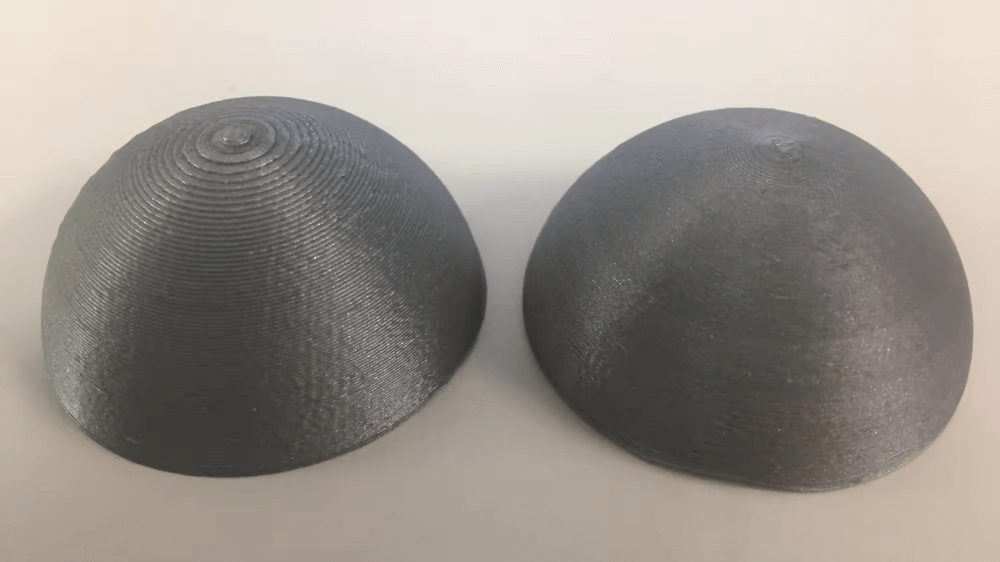
Another important advantage of adaptive layers is the smoother curved Z-axis characteristics of the models due to the lower layer height used for these Z-axis details. However, it is worth mentioning that the quality and accuracy of the XY-plane curves will not be affected by the adaptive layers, as the height of the layer only affects the characteristics of the Z-axis.
How it works?
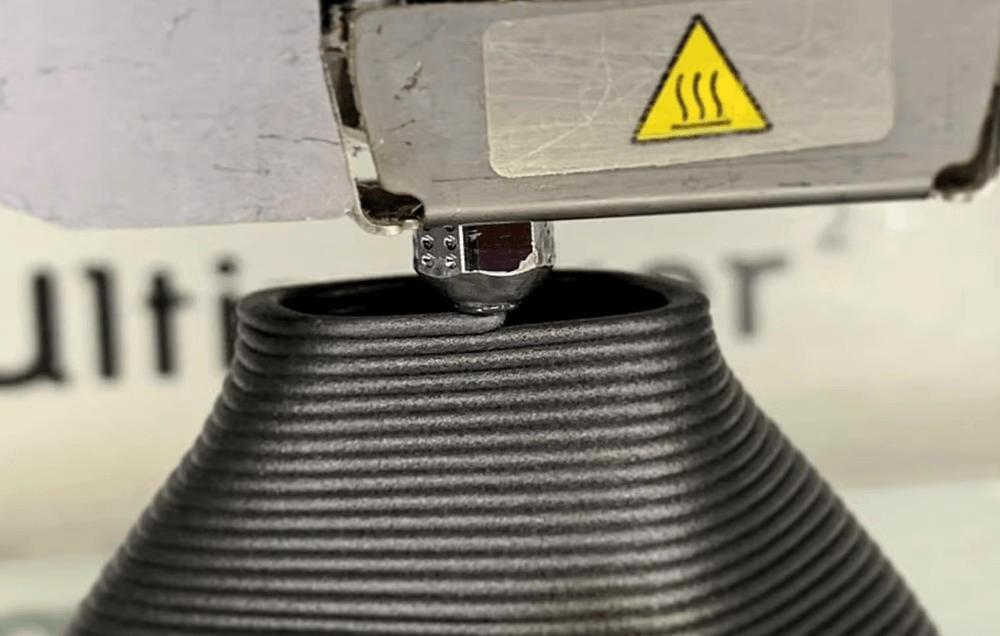
The Adaptive Layers feature allows the printer to change the height of the model layer to minimize printing time (ie by using thicker layers where possible) while maximizing print quality. using thinner layers where necessary). The function tells the slicer to set different layer heights based on the shape and structure of the model. The result is that a lower layer height is used in more detailed areas of a model with small and precise characteristics, while a higher layer height is used for more basic areas.
According to Ultimaker, once activated, the slicer analyzes the imported model by measuring the slope and angle of the outer surface. The Adaptive Layers feature typically uses information to determine which layer height would work best to reduce printing time without sacrificing the details included in the design.
Model layers that form Z-axis curves (3D curves that span the Z-axis) or other small Z-axis details are assigned a lower layer height to ensure that the curves are smoother. It's basically like using more polygons when rendering a 3D sphere, because using a lower layer height doesn't change the pattern, but makes the actual print look more similar.
On the other hand, the layers that make up the vertical, flat sections of the print are assigned a higher layer height. This is because these areas of the print do not require much detail and the use of a lower layer height will not change much the appearance of the printed pattern. You can think of this as using a low number of polygons to represent a 3D cube; in the end, only six polygonal squares (or 12 triangles) are needed. If you use more polygons, the appearance of the model will not change.
The end result of activating this feature on a typical 3D object is that the cut pattern will be able to have a gradual increase or decrease in layer height. The height of the layer that you set in Cura is always treated as the height of the base layer, and the adjusted height of the layer varies only slightly from it, which we will talk more about in the last section.
Advantages / disadvantages
Now that you know how Cura's adaptive layers feature works, let's see how it helps!
The advantages and disadvantages of adaptive layers depend on whether you plan to use a small or large print layer height. If you plan to use a low layer height, activating adaptive layers will slightly reduce the precision and detail of your print, but you will have faster printing with reduced material consumption. On the other hand, using adaptive layers on a model for which you will use a large layer height, you will see an improvement in the details of the model's precision, with a slight increase in printing time and material consumption.
Another great advantage of the Cura adaptive layer function is the reduced need for post-processing, such as sanding, compared to if you only used a higher layer height. This is because smaller layer heights are used for the curves and Z-axis details of the model, so you won't have to grind as much to achieve a smooth surface. However, this also means that you will have to sand more than if you used only a small layer height.
ADVANTAGES
- Improved curves and details along the Z axis compared to using only high layer heights
- The models will be more accurate in the height of the Z axis
- Reduced need for post-processing compared to using only high layer heights
- Faster prints than using only a small layer height
- Lower material consumption compared to using only a small layer height
DISADVANTAGES
- Curves and details of the Z axis of lower quality compared to using only a small layer height
- Slower cutting time (requires more computing power, but not much yet)
- More post-processing is required compared to using only a small layer height
- Slower prints compared to using only high layer heights
- Higher material consumption compared to using only a large layer height
Overall, the Cura adaptive layer feature is a great way to take advantage of both low and high layer heights when it's most cost-effective. Since the feature is essentially useful in any scenario, it's a good idea to leave the feature enabled in your split profile and disable it only when you want constant layer heights.
Settings
Now that you know about Cura's adaptive layers, how it works and how it helps, we'll look at how you can use and configure the adaptive layers feature in your split profile to take advantage of it. The first step in this process is activation of the function:
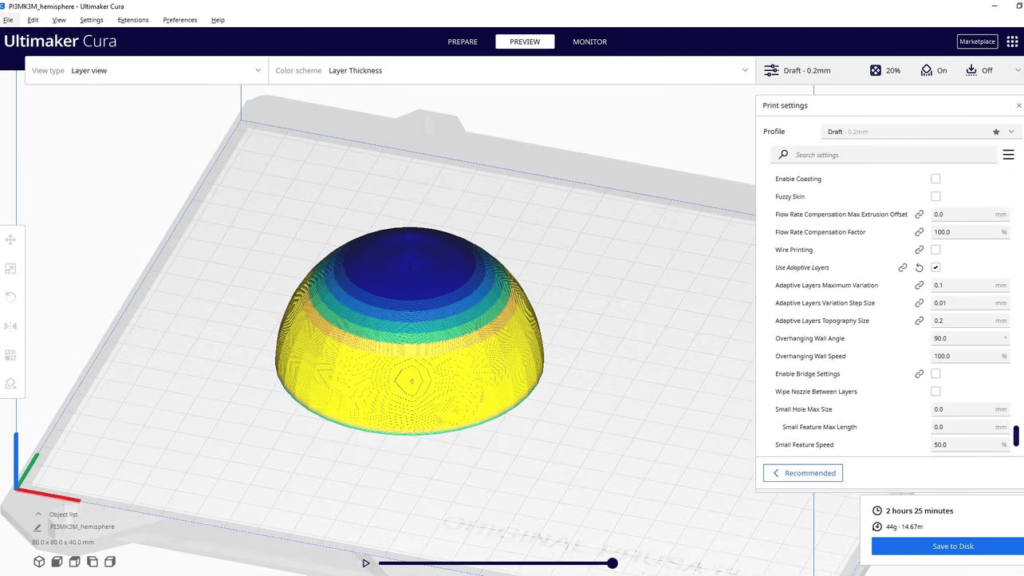
- In Cura, click the print settings box near the upper right corner of the interface.
- Click the "Custom" button to see an expanded list of available settings.
- Click the three dotted bar icon in the upper right corner of the print settings menu and select "All" to see all settings in Cura.
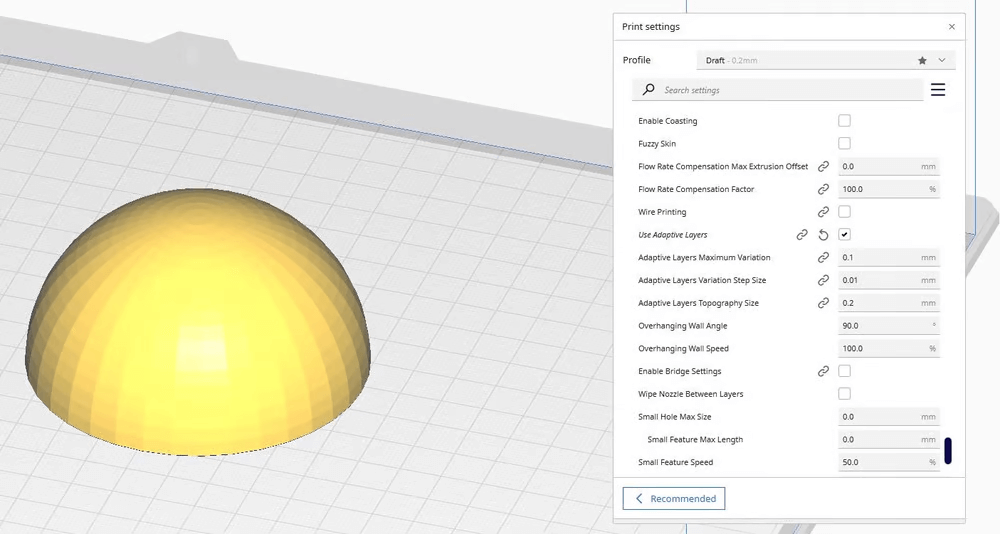
- Scroll down to the "Experimental" settings section and find the "Use Adaptive Layers" option or find it through the Cura search bar. Activate the function (if not already).
Once activated, you should see several related settings that appear below. These settings adjust the parameters of the adaptive layer formula to allow you to control the effect of the function on the way your model is cut.
- Maximum Variation: This determines how far from the height of the base layer the layer height can be set. For example, if you set a base layer height of 0.2 mm in Cura and use a maximum variation of 0.04 mm, the smallest layer height used will be 0.16 mm and the largest will be 0.24 mm. We suggest that you keep this value at 0.04 mm, Cura's default setting, and make only minor adjustments if you want a combination of more detailed or even faster layers on your prints.
- Variation Step Size: This is the difference in layer height from one layer to the next. For example, let's say this value is 0.02 mm and the cutting tool wants to increase the layer height from 0.2 mm to 0.3 mm. Cura will increase the layer height by 0.02 mm for each layer until a layer height of 0.3 mm is reached. The 0.04mm Cura should work great by default, but if you decide you want to adjust the setting, do it in small steps to ensure that the prints don't fail.
- Topography Size: This controls the shift of the horizontal distance from one layer to the next. The larger size of the topography means that the successive layers are farther apart on the X and Y axes. With a greater horizontal distance separating the vertical-consecutive layers, a higher layer height can be used, resulting in thicker layers, less model detail and stronger prints. The opposite is also true. You can leave this setting to the default value of 0.2 mm or increase it for thicker layers if you are looking for stronger parts.
0 Comments