Gaps (think voids) in 3D prints are annoying defects that mess up both the appearance and how the parts function. Check out this guide to easy fixes and how to avoid them!
3D printing is a craft that requires a lot of effort and a significant number of hours to master. Still, there's nothing more frustrating than consistently failing 3D prints. At the end of the day, all we want is to produce excellent quality prints that not only look good, but also function as they should.
Fortunately, the 3D printing community is strong and always ready to help. We have many guides and tutorials to help both beginners and advanced users. So, don't be too quick to give up on your 3D prints!
Gaps in 3D prints can be difficult to remove, especially since they can be caused by a number of different factors. In the article we will look at the possible defects that appear as gaps, their potential causes and how one can deal with them.
FIRST LAYER OMISSIONS
The first layer is considered the most important because it provides the foundation for the entire model. Therefore, it can be the deciding factor between a successful or unsuccessful print. There are several anomalies that can lead to a gap in the first layer, and all of them can cause more problems than just aesthetic defects.
Let's first look at how different types of gaps occur and what potentially causes them. Next, we'll go through the steps to deal with them.
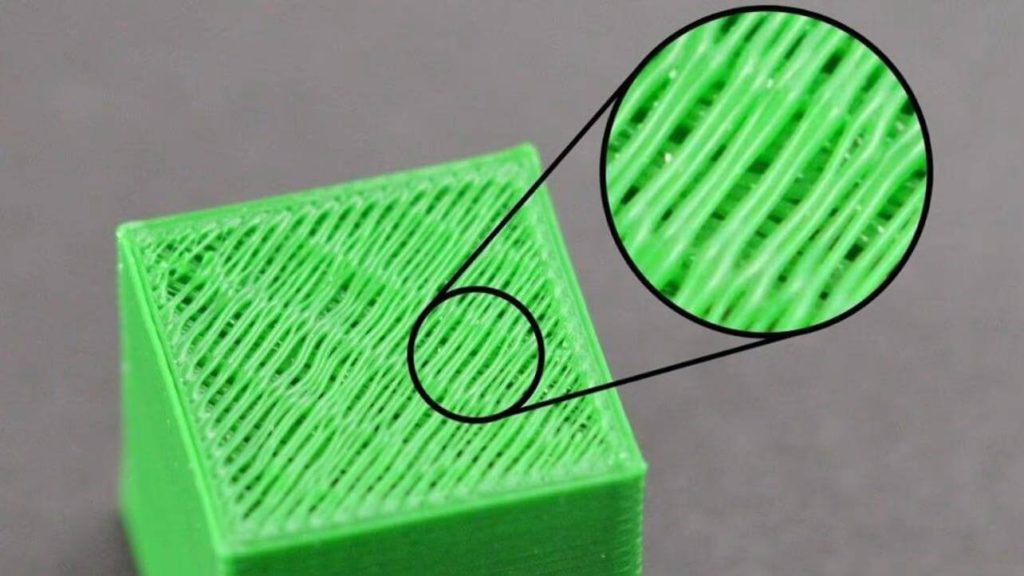
1. Gaps between lines
Cwave6k via Simplify3D )
THE PROBLEM
Your print has repeating gaps between the extrusion lines in the first layer. The lines appear to be evenly spaced apart, creating something of a grid rather than a solid flat surface at the bottom of the print.
POTENTIAL CAUSES
One option is a too large Z offset, which adjusts the physical distance between the nozzle and the build plate. In this case, the nozzle appears to be too far from the bed, preventing the layer lines from being crushed slightly during extrusion, which - with an adequate Z offset - would fill the surface. Underextrusion can also be the cause, as each line will not be as thick as expected.
2. Areas of missing material
knowledge base Prusa )
THE PROBLEM
There are areas of the first layer of the print with no material, although this area is bypassed by the nozzle. This is most noticeable while the first layer is being printed. Depending on its severity, it can potentially damage the entire print as partial adhesion will be compromised.
POTENTIAL CAUSES
Essentially, the gap between the nozzle and the bed is too small, preventing any material from extruding. In extreme cases, the nozzle will literally scrape the surface of the structure, potentially causing clogging or even hardware damage.
A poorly leveled bed or inadequate Z offset calibration are the most likely causes. Small irregularities or distortions in the building plate or residual debris can also cause small gaps in the first layer.
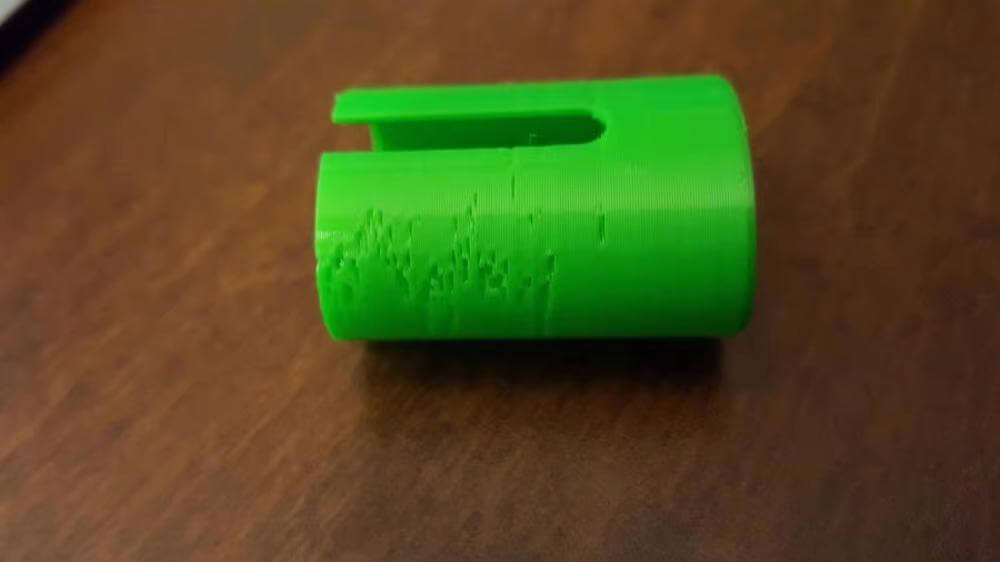
3. Hole-like anomalies
THE PROBLEM
Your print has small speckled gaps in the first layer that look like holes or short line segments. They can occur over wide areas or on isolated islands. Such defects are easily detectable and affect the aesthetics of the model.
POTENTIAL CAUSES
Poor bed adhesion can prevent extrusion lines from attaching to the build plate, especially at the beginning or very end of segment extrusion. Extrusion-related problems (such as under- or over-extrusion) can also cause these voids to form in the first layer.
Solutions: Gaps in the first layer
Most of the problems mentioned above can be solved by properly calibrating the printer. For line gaps and areas where material is missing, Z-offset corrections should do the trick, not only ensuring the integrity of the first layer, but also avoiding adhesion issues that can lead to pinhole-like anomalies. Precise extrusion calibration will ensure that the correct amount of material is deposited and thus ensure a well-built first layer.
Make sure you always have a clean and level bed. Also use proper bed adhesion techniques with materials, especially ABS and Nylon which exhibit high thermal expansion.
GAPS BETWEEN THE LAYERS
As we all know, 3D printing works by adding thin layers of material, one on top of the other, until a three-dimensional object is created. Each layer must be adequately placed on top of the previous one to create strong and good looking parts.
Most ply gaps are generated by perimeter extrusion problems or poor ply adhesion, as we'll see next. However, there are a few other flaws that could be considered omissions, and for that reason we'll look at them as well.
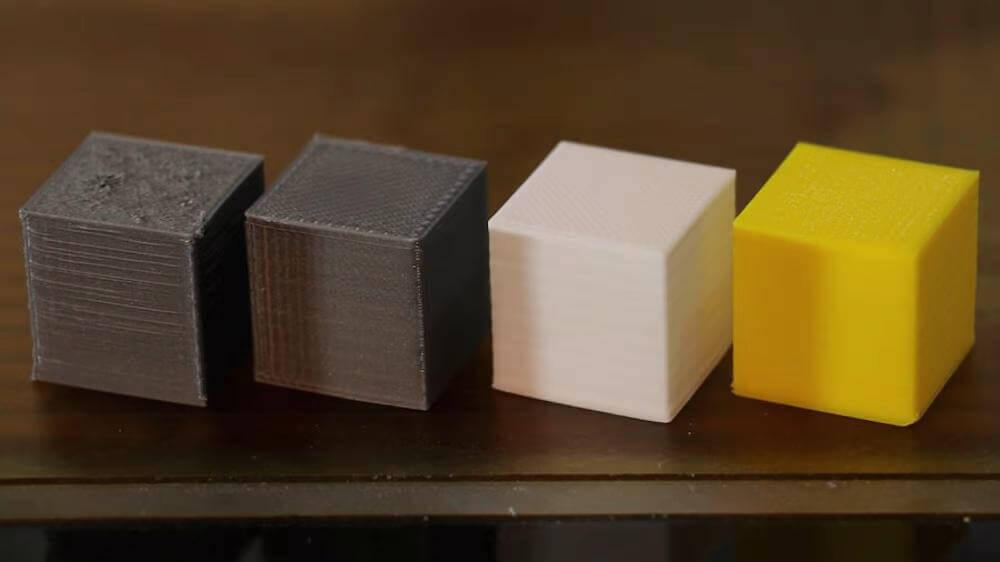
1. Holes and strokes
THE PROBLEM
Defects appear on the side surfaces of 3D printed models. These are not so much gaps as small holes and unprintable spots that lead to poor surface coverage. They can be either isolated spots or permanent spots on the surfaces of the part.
POTENTIAL CAUSES
These are mainly the result of extrusion problems where the plastic is not being deposited as it should be. Improper retraction settings can also be a cause, as it can prevent extrusion from starting after a move. Moisture in the threads can also cause small stains on the surfaces.
2. Separation of layers
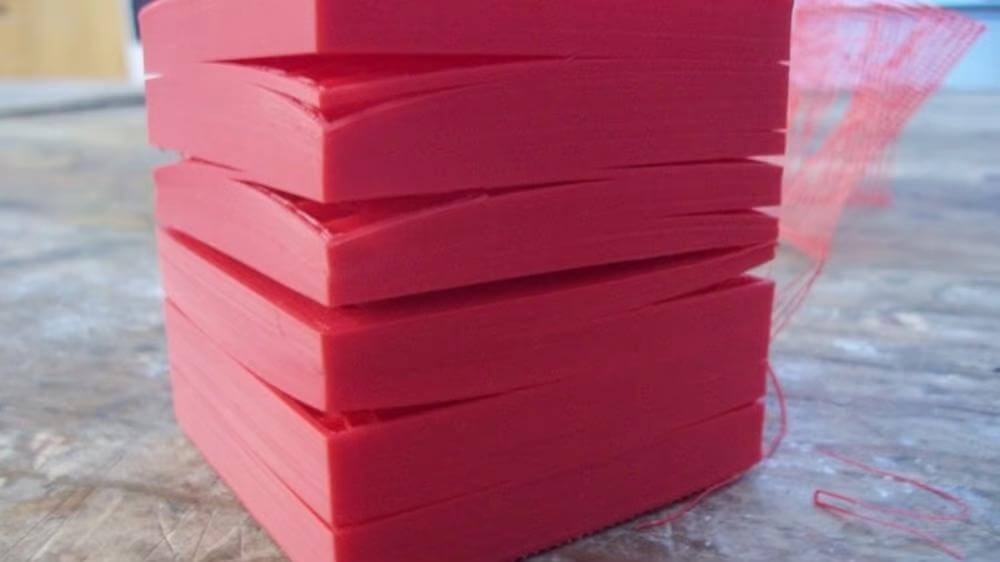
THE PROBLEM
Two or more layers are partially separated or separated. This phenomenon is also known as delamination and is quite common in 3D printing methods other than FDM. In extreme cases, the separation of the layers causes the entire printing process to fail.
POTENTIAL CAUSES
Low bond strength between layers is usually associated with low nozzle temperatures, insufficient extrusion, high print speed, or sometimes a layer height that is too high. Materials with high thermal expansion are more susceptible to this as the phenomenon is similar to warping.
Solutions: Gaps between layers
For holes and blemishes, fine-tuning the 3D printer's extrusion calibration as well as its retraction settings should avoid most, if not all, surface problems. Keeping filaments properly stored and dry should also greatly improve print quality.
Now, layering happens for many reasons. First, try adjusting the nozzle temperature and cooling settings to optimal values. Lowering the print speed should also help with layer bonding, along with the correct extrusion settings.
For materials like ABS and polyamide, a printer housing would be a great addition as it would also avoid warping and aggressive shrinking.
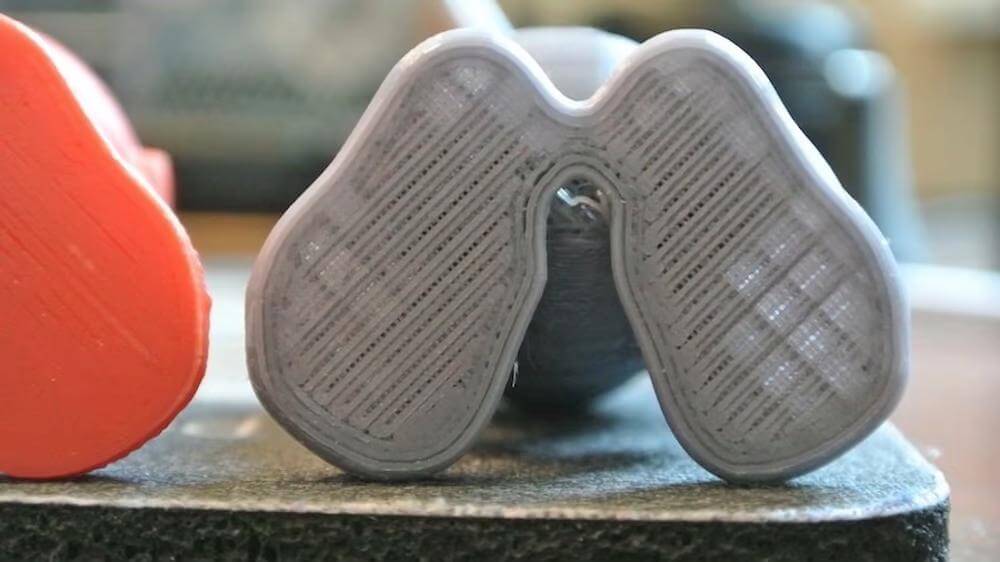
FAILURES IN THE TOP LAYER
The topmost layers are the last to be printed, enclosing the model and its partially hollow interior. For this reason, they are printed completely solid – or at least they should be. Gaps on top layer surfaces are a fairly common problem that has multiple causes, as we'll see in this section.
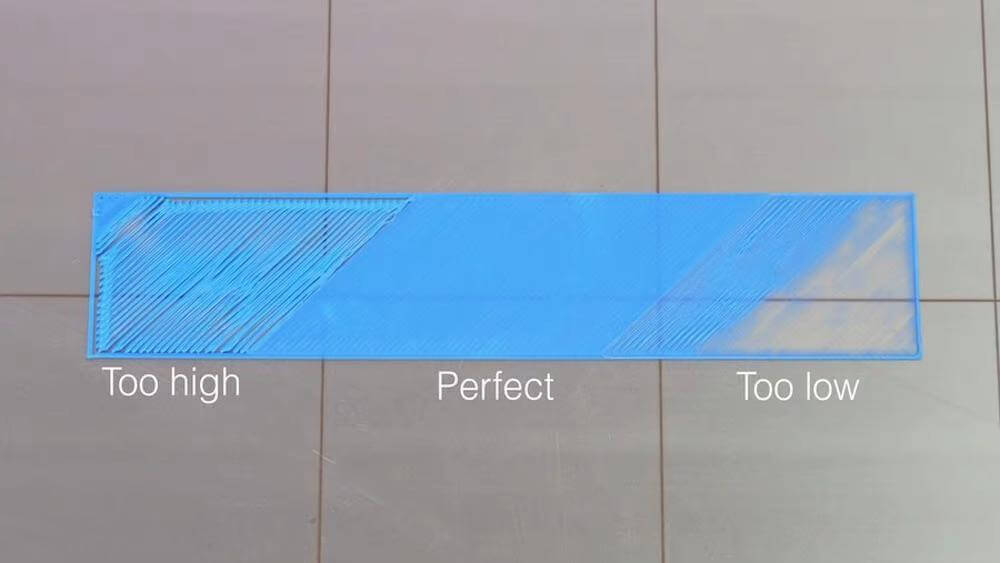
1. Gaps between lines
rigid.ink )
THE PROBLEM
There are constant gaps between the layer lines, resulting in brittle hard top layers. This problem usually affects the entire layer as a whole, especially the regions printed on the part fill.
POTENTIAL CAUSES
Either not enough material is deposited or the base for that layer is not strong enough. It is also possible that both problems are combined. Therefore, insufficient number of solid top layers, insufficient extrusion and too sparse filling can potentially lead to this situation.
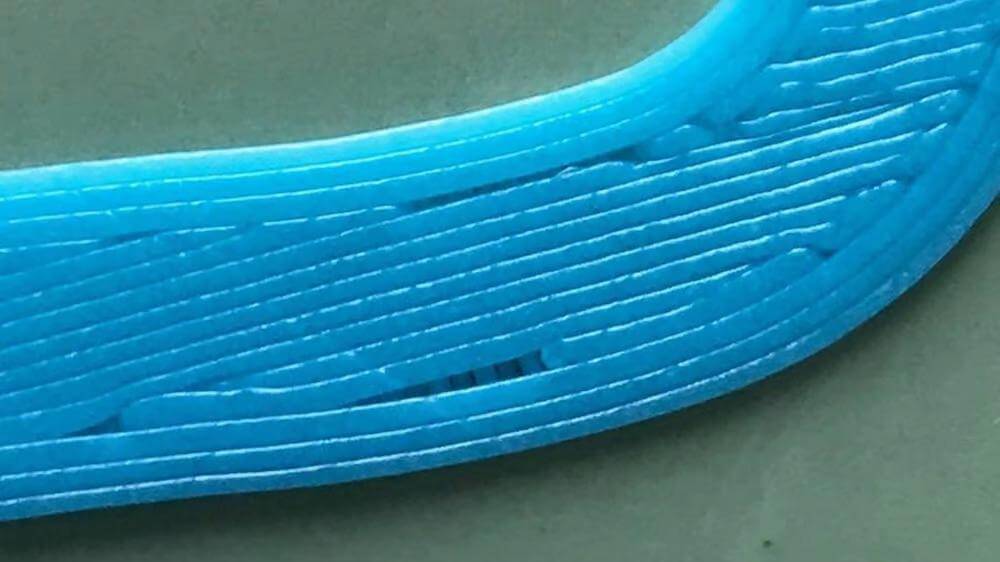
1. Gaps in the walls
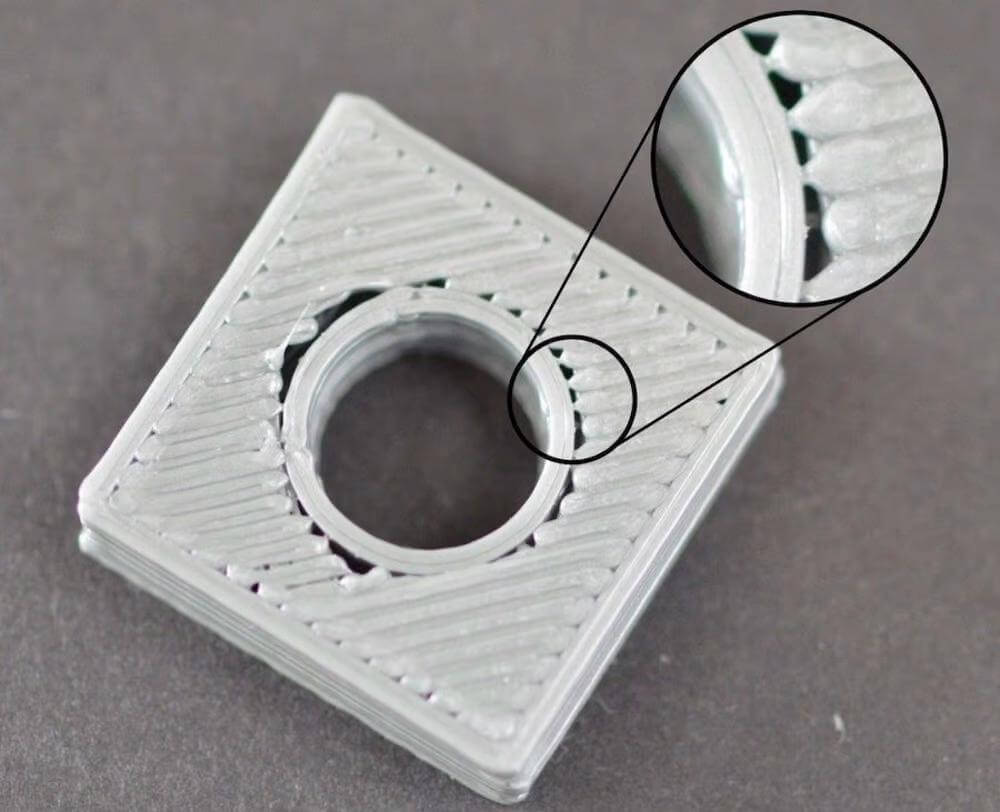
THE PROBLEM
The print has holes between the top layer and its perimeter. This is also known as wall separation and, given that the filling is laid in straight lines, it is easily noticeable in circular features such as holes and cylinders.
POTENTIAL CAUSES
Printing the top layer too quickly can cause this problem, as can under-extruding. In some cases, previous layers printed at too low a fill rate can also cause holes in the wall.
Solutions: Gaps in the top layer
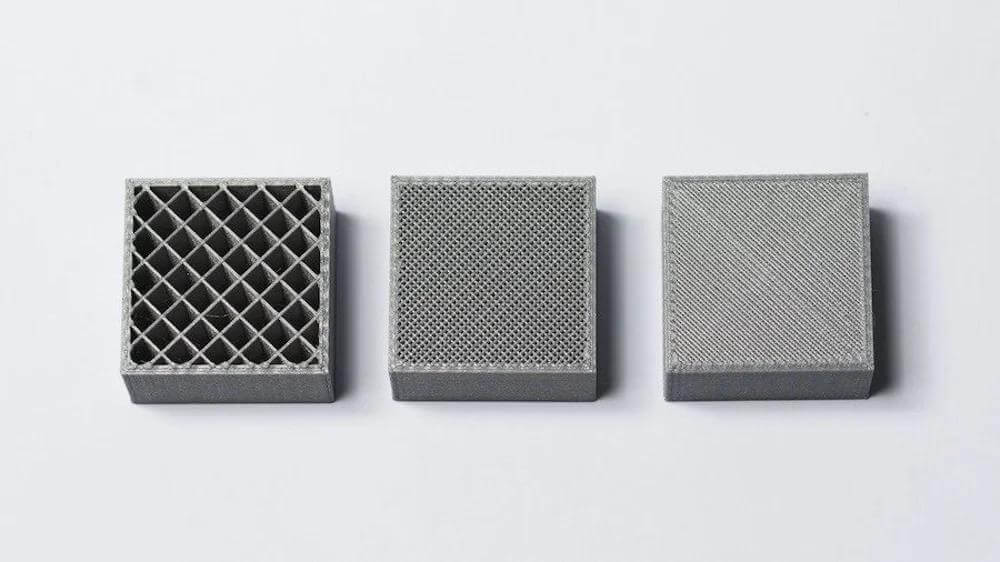
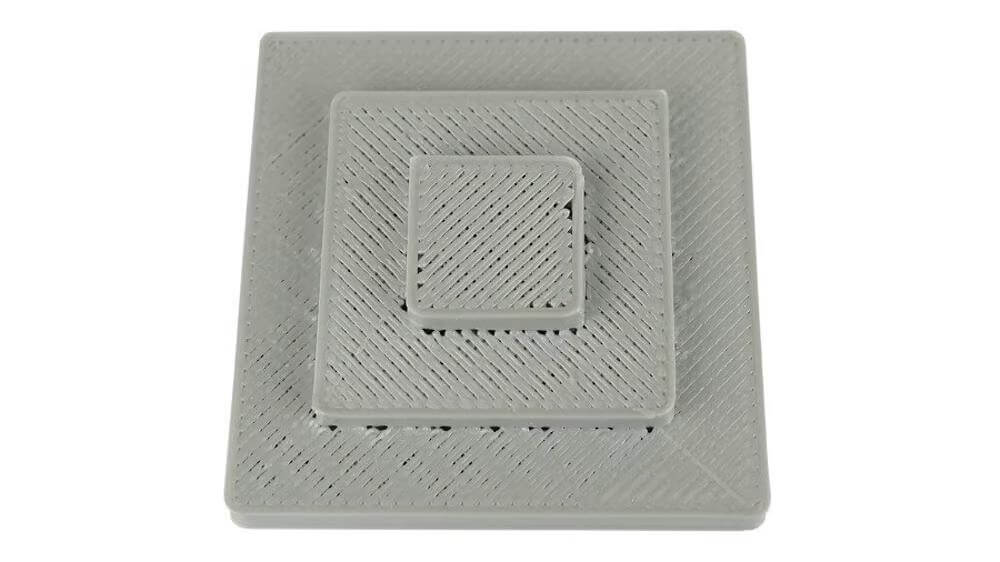
In addition to a thorough extrusion calibration, increasing the number of solid top layers or fill percentage can eliminate the presence of line gaps in the top layers. To improve the base of the upper layers, it is also worth trying out different fill patterns.
Dealing with cracks in walls can be extremely challenging. Some 3D cutters like Cura and Simplify3D have specific print settings to correct this problem. A good place to start would be the Infill Overlap (Cura) or Outline Overlap (Simplify3D) settings, both of which control how much the fill overlaps the outline perimeters.
In addition, reducing the print speed and increasing the fill rate can potentially help the top layer lines to be stitched properly.
0 Comments