Ако харесвате ретро винил, подгответе се за бъдещето със собствени 3D отпечатани плочи и плейъри! Прочетете всичко, което трябва да знаете.
Всеки вече може да прави и персонализира неща по-лесно от всякога благодарение на 3D принтирането. От стойки за лаптопи до инструменти и дори копие на себе си , достъпното производство е във възход.
Тъй като всички тези пластмасови части се произвеждат от ентусиасти, човек може разумно да се чуди: „Ами плочите?“ В края на краищата, те са направени от винил, следователно трябва да можем да създаваме свои собствени персонализирани албуми от различни видове пластмаса, нали?
В тази статия ще разгледаме постигнатото досега, както и проекти, с които можете да се захванете днес в стремежа си да отпечатате почти всичко в 3D, дори запис, който може да се възпроизвежда.
ПРЕДИЗВИКАТЕЛСТВОТО
Въпреки че виниловите плочи се завръщат, производството им винаги е било извън възможностите на любителите. Създателите и аудиофилите сега се чудят дали 3D принтирането е отговорът.
Добрата новина е, че технологията за 3D печат може и е била използвана за отпечатване на записи! Но все още не можем да започнем да отпечатваме любимите ви мелодии… Има няколко неща, които трябва да имате предвид, и няколко доста големи предизвикателства, които ще трябва да преодолеете, преди да можете да пуснете успешен аудиозапис.
Пресъздаване на винил

Първо, нарича се винил, но в действителност винилът, използван в традиционните записи, е поливинилхлорид (PVC), термопластичен полимер. Това е вид пластмаса, която става гъвкава и формована при нагряване, което позволява да бъде оформена в плоча по време на производствения процес.
PVC е популярен избор за винилови плочи поради своите желани свойства като издръжливост, гъвкавост и добро качество на звука, когато се обработва правилно. Много нишки, използвани в 3D печата, са избрани за подобни атрибути, но се различават по състав като PLA, PETG, TPU и ABS .
Традиционните винилови плочи се произвеждат чрез леене под налягане : Виниловите пелети се нагряват, шприцват се във форма и се пресоват във формата на плоча.
От друга страна, 3D печатът с fused deposition modeling(FDM) включва отлагане слой по слой на избраните от вас материали, обикновено на ролка от нишка. Гъвкавостта и издръжливостта на PVC, използван в плочите, е специално подходящ за аудио възпроизвеждане, докато FDM нишките имат разнообразие от качества, които могат да се използват за много видове приложения (независимо дали избирате PLA , PETG или ABS , например ).
Съображения
amandaghassaei чрез Instructables )
Сложните и фини канали, открити на традиционните винилови плочи, са от решаващо значение за вярното аудио възпроизвеждане. Постигането на това ниво на прецизност и поддържането на такива строги допуски е предизвикателство, особено за любители FDM 3D принтери . Вашите средностатистически принтери Creality или Prusa имат ограничения в разделителната способност и височината на слоя , което пряко засяга нивото на детайлност, постижимо в жлебовете на отпечатания запис.
Създаването на запис на 3D принтер със задоволително качество на аудио възпроизвеждане е трудно (меко казано) поради вероятното въвеждане на повърхностни несъвършенства и артефакти на наслояване по време на процеса на печат. Тези несъвършенства могат да нарушат гладкостта и последователността на жлебовете, което води до изкривяване на прецизността на звука по време на възпроизвеждане, което води до ниско качество на звука в най-добрия случай и неразбираем шум в най-лошия.
Да приемем, че сте готови да продължите напред, но след това се сблъсквате с множество други проблеми, често срещани при 3D печатането – такива, които могат да обрекат записа ви, преди изобщо да бъде пуснат. Решаването на тези проблеми включва намирането на деликатно равновесие между различни фактори.
Правилният материал
Материалният въпрос е пречка, която не може да бъде подценявана. PLA може да бъде лесен за печат, но няма да издържи, докато TPU може да е гъвкав и издръжлив, но може да не постигне необходимите детайли. PETG или ABS може да са здрави и достатъчно детайлни, но без необходимото покритие.
Както посочихме преди, плочите са винилови с причина. За съжаление (или за щастие?), PVC не е често използван материал в 3D печата поради токсичните си емисии, високите изисквания за температура на печат и корозивността. Честно казано, има по-безопасни материали за 3D печат.
Правилните настройки за печат и адхезия

NEmmert2000 чрез Thingiverse )
Балансирането на скоростта на печат с височината на слоя е от решаващо значение, тъй като оказва влияние върху времето и детайлите, но може да бъде предизвикателство за оптимизиране. Изборът на правилния материал също е важен, тъй като той трябва да постигне баланс между издръжливост, покритие на повърхността и възможност за печат. Постигането на гладка повърхност на 3D отпечатания запис, жизненоважно за качеството на възпроизвеждане, често изисква щателни техники за последваща обработка.
Освен това, осигуряването на правилно залепване към печатащото легло и минимизирането на риска от изкривяване по време на печат са често срещани грижи, които трябва да бъдат внимателно управлявани. Тези проблеми не са изолирани от отпечатването на запис, разбира се. Но някои могат да бъдат по-голямо предизвикателство за преодоляване от други.
Правилната последваща обработка
Каква техника за последваща обработка ще използвате, за да осигурите чист запис с добро възпроизвеждане? Отново се натъкваме на поредица от проблеми. Например, шлайфането и боядисването са лоши подходи, които могат да нарушат възможността за качество на плочата.
Някои може да пожелаят да опитат химическо изглаждане или изглаждане с пара. Само някои материали могат да бъдат химически изгладени. По-важното обаче е, че процесът на изглаждане може да подобри цялостния външен вид на 3D отпечатания запис, но в същото време да го направи невъзможен за възпроизвеждане.
Като цяло, последващата обработка на вашия запис ще бъде трудна, ако не и невъзможна за най-често използваните методи.
Как да създадете свой собствен

Но да приемем, че успеете да преодолеете всички препятствия, описани по-горе. Какви точно ще бъдат стъпките за създаване и отпечатване на собствен запис?
Създаването на подходящ STL файл за 3D отпечатване на запис, който може да се възпроизвежда, включва конвертиране на аудио данни (във WAV формат ) във формат, който представлява каналите на записа. Процесът обикновено използва техника, известна като аудио литография. Това е едновременно лесно и малко трудно:
- Първо, използвате софтуера RIP , за да конвертирате аудио WAV файла в изображение с висока разделителна способност (като PNG или TIFF). Яркостта на всеки пиксел представлява амплитудата на формата на аудио вълната.
- След това трябва да конвертирате изображението с висока разделителна способност в STL файл с помощта на специализиран софтуер, който преобразува нивата на яркост на изображението в дълбочина, създавайки 3D представяне на формата на аудио вълната.
- След това променяте параметри като дълбочина, ширина на жлебовете и цялостен дизайн, за да отговарят на скоростта на възпроизвеждане (напр. 33 rpm или 45 rpm).
Звучи достатъчно лесно, нали? Е, има доста стъпки, преди дори да се доближите до 3D принтер: аудио семплиране, квантуване и нормализиране на аудиото, създаване на изображение и накрая конвертиране на изображението в STL.
Както можете да видите, процесът на отпечатване на вашия собствен запис все още е с доста пречки. Много по-лесно предизвикателство за днешните винилови ентусиасти би било отпечатването на грамофон или свързани аксесоари. Въпреки че в никакъв случай не е лесна задача, както резервни части, така и цели грамофони са постижими на повечето потребителски FDM принтери.
По-долу ще ви представим брилянтната работа на някои производители, които са решили да се справят с предизвикателството и да създадат свои собствени 3D отпечатани плочи, както и невероятни грамофони и аксесоари.
ГРАМОФОННИ ПЛОЧИ
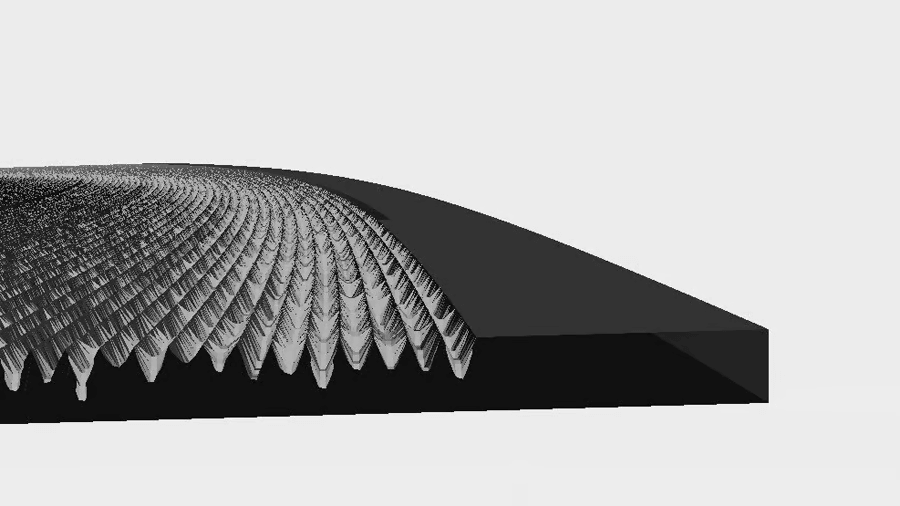
Първият в света 3D печатен запис
Първият в света 3D печатен запис е произведен преди повече от 10 години на 3D принтер от смола Objet Connex 500 от Amanda Ghassaei. Макар и успешен, разделителната способност далеч не беше достатъчно висока, за да възпроизведе същото качество на звука като на произведена в търговската мрежа винилова плоча. Този запис възпроизвежда песен на Nirvana, която е дигитализирана с процес, разработен за конвертиране на аудио файлове в 3D модели на записи. По това време бяха необходими над 1 GB място за съхранение, за да се конвертира MP3 песен в запис като този!
Този проект на Instructables не е актуализиран от известно време, но дава подробен поглед върху процеса, като няколко връзки вече са прекъснати. Независимо от това, ако следвате указанията на Instructables, съчетани с информацията, налична в GitHub , ще намерите това, което може да е достатъчно задълбочено ръководство, за да създадете свой собствен възпроизвеждан запис, ако можете да навигирате около мъртвите връзки.
Дизайнерът е създал редица други произведения, включително и лазерно изрязана версия на запис.
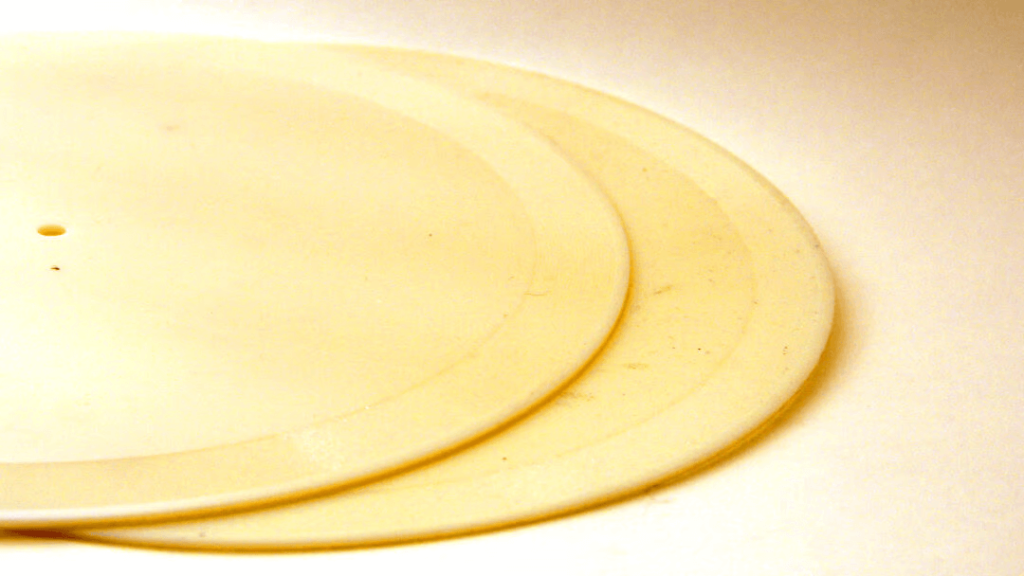
Персонализиран диск Fisher-Price

Може би искате да отпечатате запис, но да използвате малко по-прост подход. Този 3D отпечатан персонализиран диск за „грамофон“ от ерата на Fisher-Price от 1970 г. е отличен проект, който просто трябваше да включим тук. Ако имате една от тези стари играчки у дома и искате да използвате софтуера на създателя, за да направите свой собствен персонализиран диск, това е доста удобно.
Създателят на този проект, потребителят на Instructables fred27, направи диск, който възпроизвежда музикалната тема от Star Wars и друг, който разтърсва „Stairway to Heaven“ на Led Zeppelin.
Смятаме, че възможността да възпроизвеждате собствени персонализирани песни на нещо подобно наистина показва какво може да направи 3D принтирането за старата технология. Само си представете какви други стари неща лежат наоколо, за които бихме могли да отпечатаме персонализирани аксесоари и дори песни!
Грамофон
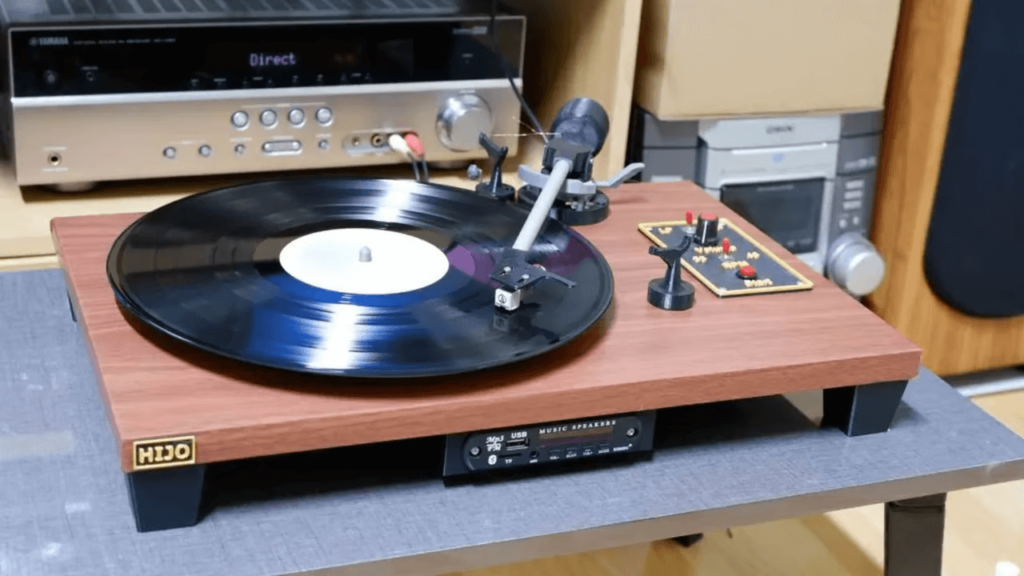
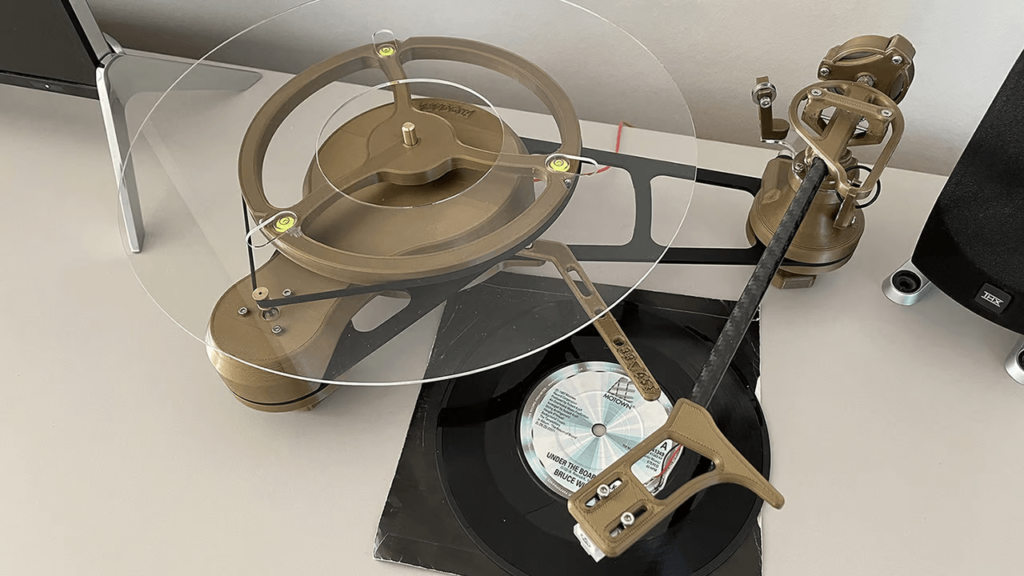
Захранван от Arduino Uno , този напълно функционален грамофон е направен от 3D отпечатани части и части от 3D принтер. Чрез използването на драйвери TMC2209, известни със своите усъвършенствани функции за управление на стъпкови двигатели, конструкцията подчертава прецизността и ефективността в работата на грамофона.
Този проект е ценен за ентусиасти, домашни любители, които искат да разберат и създадат функционален грамофон или да включат такива компоненти в своите персонализирани аудио настройки, в съответствие с нарастващия интерес към аналоговите аудио изживявания.
Грамофонът е доста достъпен, тъй като е отпечатан от ABS и TPU. Дизайнерът предоставя пълен списък на всички необходими части. Те дори се свързват към GitHub за изходните кодове на Arduino и няколко допълнителни подробности, както и YouTube видеоклипове за тестване.
Ако сте отпечатали своя грамофон или сте направили опит да отпечатате своя собствена плоча, вероятно няма да се откажете от тази задълбочена компилация.
0 Comments