Започването на нещо ново винаги ще има крива на обучение, но статия като тази може да помогне тази крива на изкачване да стане по-лесно .
3D принтирането е технология, която е дала възможност на хора с всякакъв произход и професии да творят, но като всички нови технологии, има известна крива на обучение, когато става въпрос за 3D принтиране. За щастие на вас, новодошлите, ще ви предоставя списък от десет съвета, които трябва да имате в ума си, когато започнете да изживявате процеса на 3D печат.
Нивелиране на леглото и Z отместване
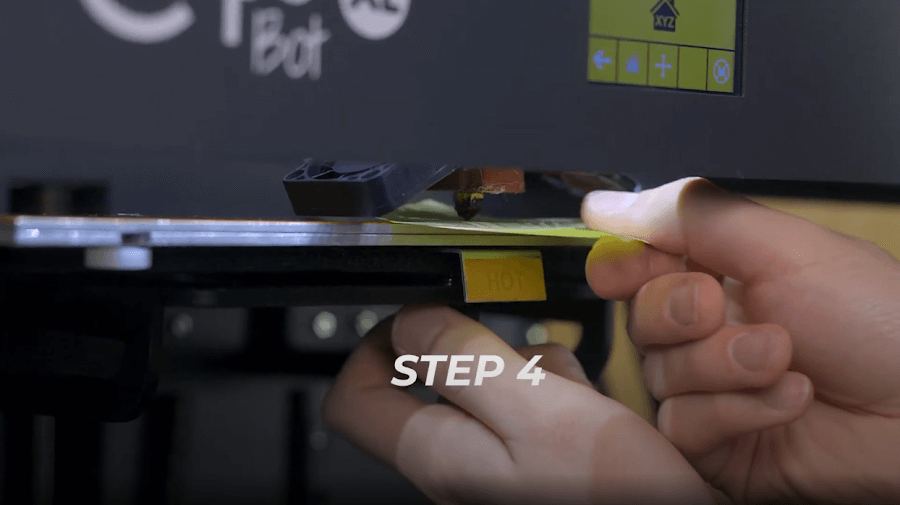
Първата стъпка в създаването на успешни 3D отпечатъци е нивелиране на леглото на вашия 3D принтер и осигуряването на правилното разстояние на първия слой от дюзата ви; това е основата за всеки следващ слой. Номенклатурата може да е объркваща за някои- това означава, че леглото винаги е на същото разстояние от дюзата на 3D принтера, независимо къде на леглото сте.
Много 3D принтери разполагат със сензори за автоматично калибриране на леглото на 3D принтер, за да се гарантира, че дюзата е на постоянно разстояние от леглото. Това обаче не е индустриален стандарт и все още има много модели 3D принтери, които се нуждаят от помощ, за да калибрират и нивелират леглото. Тези принтери обикновено разполагат с някаква форма на винт или копче от долната страна на леглото, за да регулират наклона на леглото и колко далеч е от дюзата. Трябва да следвате всички инструкции за нивелиране, включени към вашия 3D принтер, но като цяло нивелирането на леглото се извършва по следния начин:
Забележка: Три точки определят една равнина, но много принтери все още използват четири винта за нивелиране на леглото, с по един във всеки ъгъл. Това все още може да работи, просто е малко по-трудно да го направите перфектно.
- Затегнете всички винтове на всеки ъгъл, така че да имате достатъчно място да ги разхлабите по-късно.
- Начало на оста Z. При някои принтери Z0 (home) може да е твърде далеч от леглото, дори когато всички винтове са разхлабени. В такъв случай ще трябва да преместите Z-минималния краен ограничител малко по-надолу, за да калибрирате.
- Изключете принтера или изберете „Освободете двигателите“ или „Изключете двигателите“. Повечето принтери имат нещо подобно в LCD менютата. Това ще ви позволи да преместите печатащата глава, без двигателите да са блокирани на място.
- Преместете печатащата глава върху всеки винт, който изравнява леглото, поставете лист хартия между дюзата и леглото и разхлабете винта, докато почувствате съвсем леко съпротивление, когато дърпате хартията. Не трябва листът хартия да е “заключен” между двете, а просто достатъчно натиск, за да усетите съпротивлението, когато местите хартията.
- Повторете това за другите винтове. Уверите се, че всеки винт прищипва листа хартия с еднакъв натиск, за да имате равно легло.
- След като регулирате всички винтове, проверете работата си, като преместите дюзата върху винтовете отново и се уверите, че не са се изместили от предишни настройки.
- Стартирайте печат. Можете да правите корекции, докато 3D принтерът печата, за да настроите фино първия си слой.
След като го изравните, той трябва да остане нивелиран за известно време и от време на време може да се наложи да регулирате леко винт, за да го върнете обратно на ниво.
Смяна на нишката
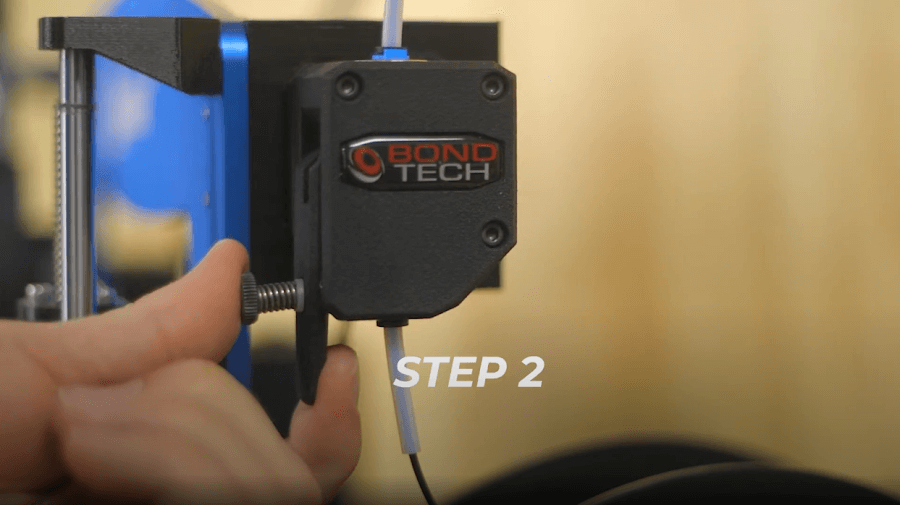
За разлика от принтерите за хартия, не можете просто да отворите тавата и да смените нишката, както можете да сменяте касетите с мастило, има процес, който може да бъде неинтуитивен, ако никога преди не сте го правили.
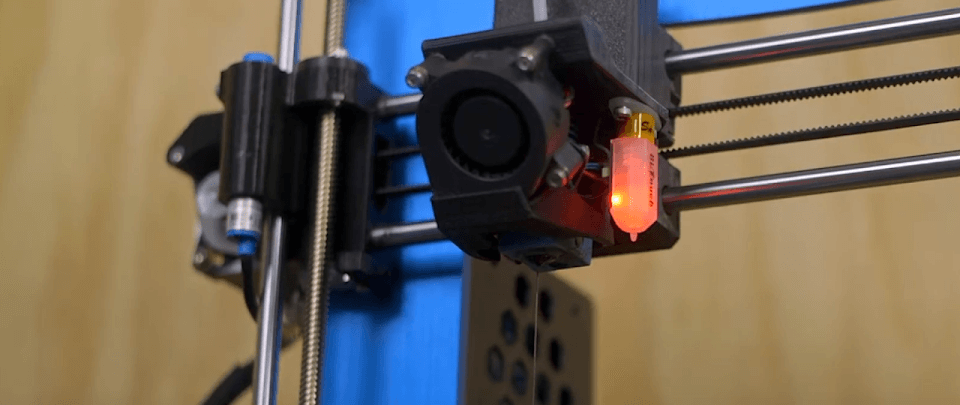
Премахването на нишката на някои 3D принтери може да бъде толкова лесно, колкото бутон „Unload“, където други ще изискват ръчно преминаване през процеса. За да премахнете нажежаемата жичка и да смените с различен цвят или материал, трябва първо да загреете дюзата, в противен случай, ако нишката е студена, тя ще залепне за вътрешността на дюзата и ще бъде невъзможно да се отстрани.
- Започнете, като загреете 3D принтера до температурата на печат на материала, който имате в него. Ако се опитвате да премахнете PLA , настройте го на 200°C, ABS на 230°C и т.н.
- След като достигне температурата, освободете напрежението върху нажежаемата жичка, като освободите празния ход. При някои 3D принтери това се прави чрез натискане надолу или издърпване на някакъв пружинен лост, който упражнява натиск върху нишката.
- Натиснете леко нишката, докато излезе малко количество от дюзата. Това прави върха на нишката горещ и ковък и ще направи отстраняването по-чисто и по-лесно.
- След като видите, че нишката излиза, внимателно я издърпайте, за да я извадите от екструдера. Това премахва по-голямата част от нишката, но вероятно ще има остатъци, когато поставите новата нишка.
- Отрежете върха на новата нишка под ъгъл и я поставете в екструдера, като се уверите, че се подава правилно.
- Ако материалът е различен от този, който е бил зареден преди това, температурата трябва да бъде зададена на тази температура на печат, която е по-висока.
- Ако сте печатали с ABS и преминавате към PLA, оставете температурата на 230°C.
- Ако сте печатали с PLA и преминавате към ABS, повишете температурата до 230°C.
- Ръчно натиснете нишката към дюзата или управлявайте екструдера от менюто, за да подадете нишката.
- След като видите, че новият материал преминава чисто и без смесване на цветове или изгорял материал от предишната нишка, тогава сте готови!
Подходящият материал за работата
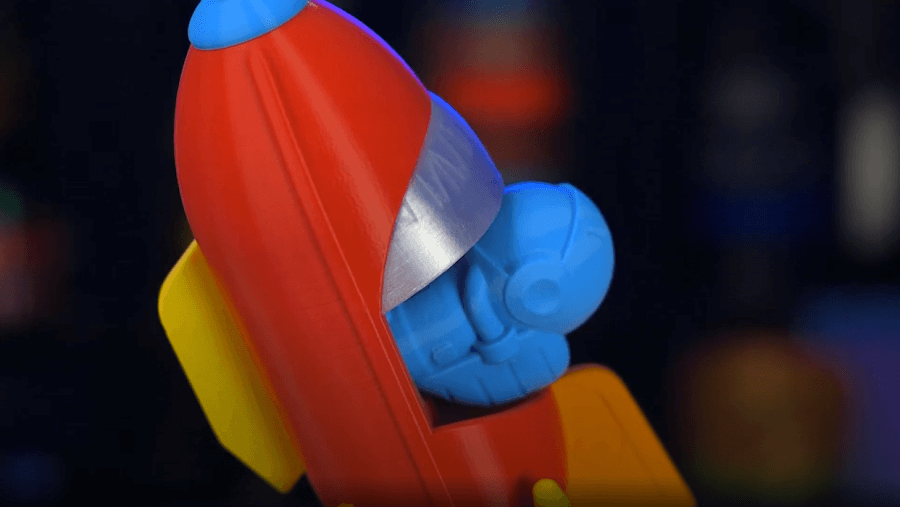
Колкото повече 3D печатате, толкова по-лесно ще бъде да изберете правилната нишка за 3D печат за конкретния проект. Няма универсална нишка, която да работи за всичко, така че с времето ще научите кои материали работят най-добре. Вземете например PLA : PLA е абсурдно лесен за печат, ако не и най-лесният материал за 3D печат и се предлага в набор от цветове (някои дори искрят или флуоресцират), но PLA не е проектиран да работи в топла среда като в на слънце или в кола.
ABS може да оцелее навън известно време, преди ултравиолетовата светлина да го разгради, но има по-стръмна крива на обучение за успешен печат с ABS. Можете да използвате PLA за вашите основни прототипи или за вътрешни, хладни приложения и да запазите ABS за по-топли, функционални приложения. Важно е да можете да претегляте различните предимства и ограничения на различните материали, за да изберете нишката, която ще даде най-добрите резултати при 3D печат.
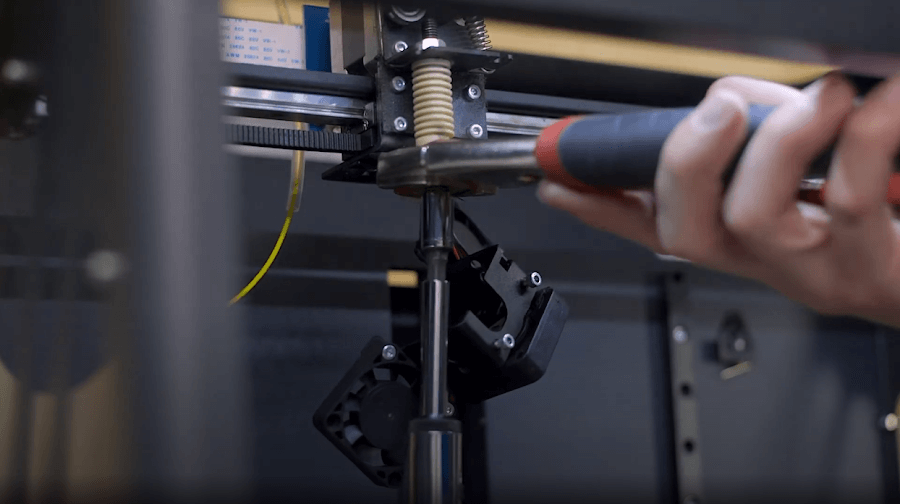
Сменете дюза
Смяната на дюзите е нормална част от поддръжката, която може да промени нормалното ви качество на печат, просто като смените износена дюза. Или може да искате да надстроите- материал на дюзите или диаметъра на отвора, за да можете да печатате с различни нишки с по-висока скорост. Знанието как да премахнете и смените дюзата на 3D принтер е важен инструмент, който трябва да имате в кутията с инструменти за 3D печат.
Основното при него е: загрейте горещия край, за да разхлабите нишката от дюзата, използвайте клещи за заключване на канала, за да задържите нагревателния блок, използвайте гаечен ключ с подходящ размер, за да развиете дюзата и обърнете стъпките с новата дюза, без като приложите достатъчно сила върху дюзата, за да я счупите – достатъчно е да стегнете с един пръст.
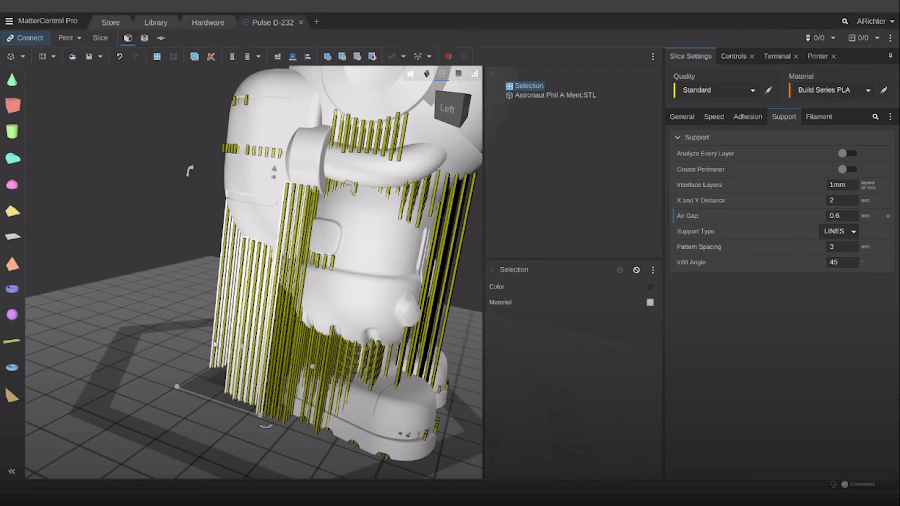
Кога да използвате поддръжка за по-сложни модели
Някои модели не могат да бъдат отпечатани без поддръжка, а други губят важни функции, като ги включват. Важно е да можете да определите кога даден модел се вписва в някоя от тези категории, за да подобрите шансовете си за успешен 3D печат.
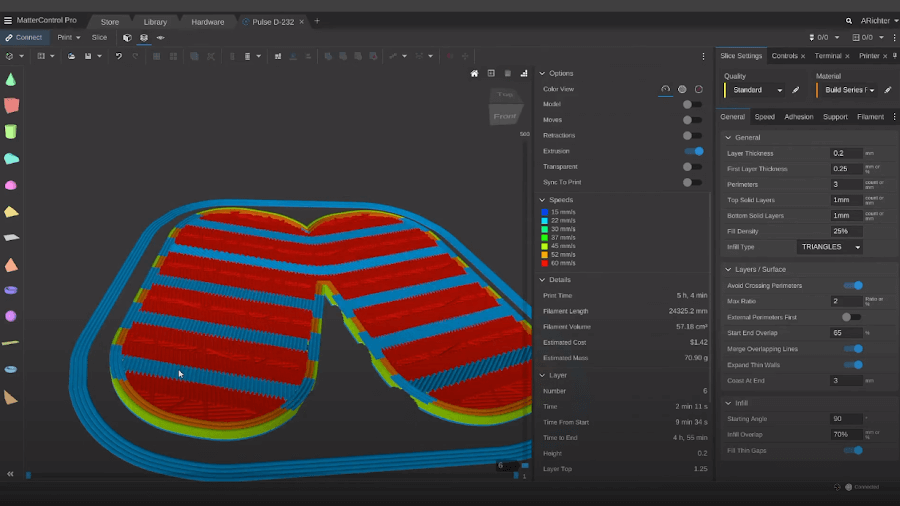
- Сценарии за избягване на използването на опори. Само защото даден модел има надвеси, не означава, че се нуждае от опора; общото правило е, ако ъгълът е по-голям от 45 градуса, помислете за добавяне на опора, но някои модели са специално проектирани да не се нуждаят от опори, дори когато нарушавате това правило. Преодоляването е техника за 3D печат, която позволява напълно плоска повърхност да бъде отпечатана във въздуха, ако има ръб от двете страни за съединяване; мостовете няма да изискват поддръжка за успешен 3D печат.
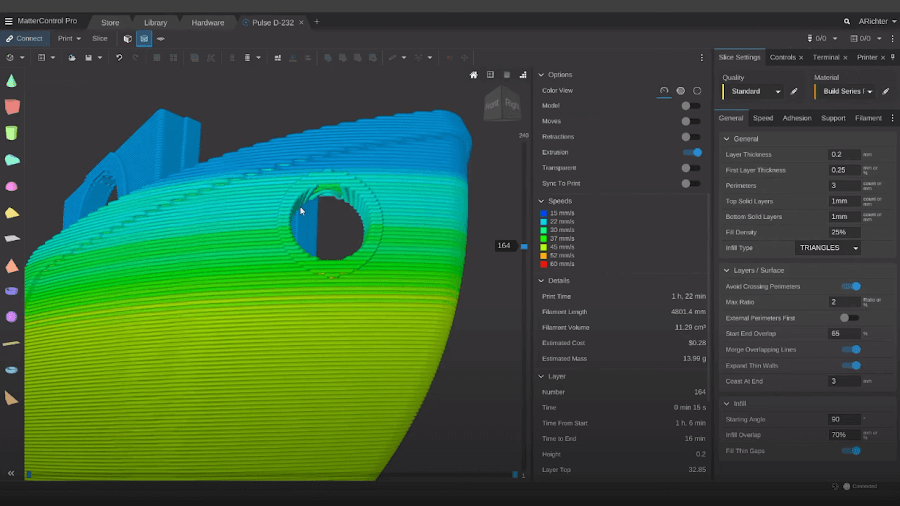
Цилиндричните отвори отстрани на модел също обикновено не се нуждаят от опора, въпреки че има участъци от него под ъгли, по-големи от 45 градуса. Ако нямате подходящо охлаждане на слоя, може да забележите малко увисване по тавана, но в противен случай той ще 3D отпечата успешно.
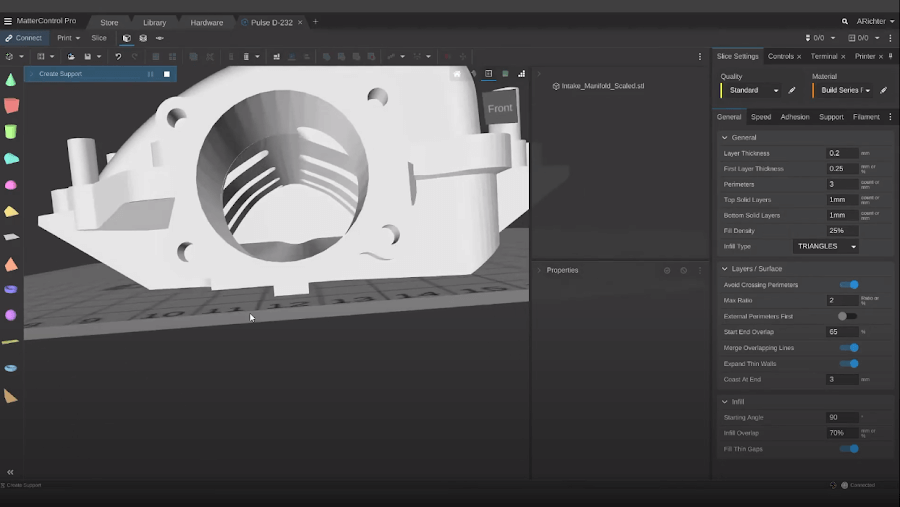
Вътрешните функции може да бъдат запълнени от поддръжка и да бъдат трудни за премахване. Вземете например някои от тези части на двигателя. Те имат вътрешни канали, които биха били напълно запълнени и е почти невъзможно да се премахнат, без да се повреди готовият 3D печат.
- Сценарии, които да обмислите при използване на опори. Повечето 3D модели ще се нуждаят от някаква форма на поддръжка. Секциите, които са напълно неподдържани и във въздуха, ще се нуждаят от малко скеле, което да се използва като основа, преди останалата част да може да бъде отпечатана. Други може да са под положителен ъгъл, но достатъчно екстремен, за да изискват опори за създаване на по-добра долна повърхност.

Познаването на подходящия момент за използване на опори е нещо, което изисква учене, но докато напредвате като потребител на 3D принтер, ще започнете да определяте кога опорите са и кога не са необходими и до каква степен. Почти всички програми за нарязване на 3D принтери (слайсери) могат да идентифицират къде са необходими опори според зададени от потребителя критерии и да генерират поддържащи структури. По-усъвършенстваните слайсери дори ви дават възможността да добавяте или премахвате индивидуални опори, така че да можете ръчно да коригирате всякакви проблемни зони. С течение на времето може да откриете, че проектирате вашите 3D модели така, че изобщо да не изискват опори и вместо това да използвате хитри техники за проектиране, за да заобиколите необходимостта от поддържащи структури.
Лепила за легла
Адхезията на леглото е огромен фактор за успеха на 3D отпечатъците, което се дължи отчасти на съвместимостта на различни филаменти за 3D печат и материали за повърхността на леглото. Всяка строителна повърхност има своите предимства, като максималните температури на печат, материалите, с които работят добре, и лекотата на отстраняване за готови 3D отпечатъци.
За да обобщим основите:
- Стъклото е чудесно за PLA (нагрято) и найлон (нагрято с PVA лепило).
- Magigoo и 3D Gloop за лепила за легло, специфични за материала
- LayerLock Garolite (с PVA лепило) за найлон и найлонови композити.
- LayerLock прахово боядисан PEI за печат с общо предназначение (с PVA лепило за гъвкави материали и PETG като освобождаващ агент)
- LayerLock Polypropylene за полипропилен
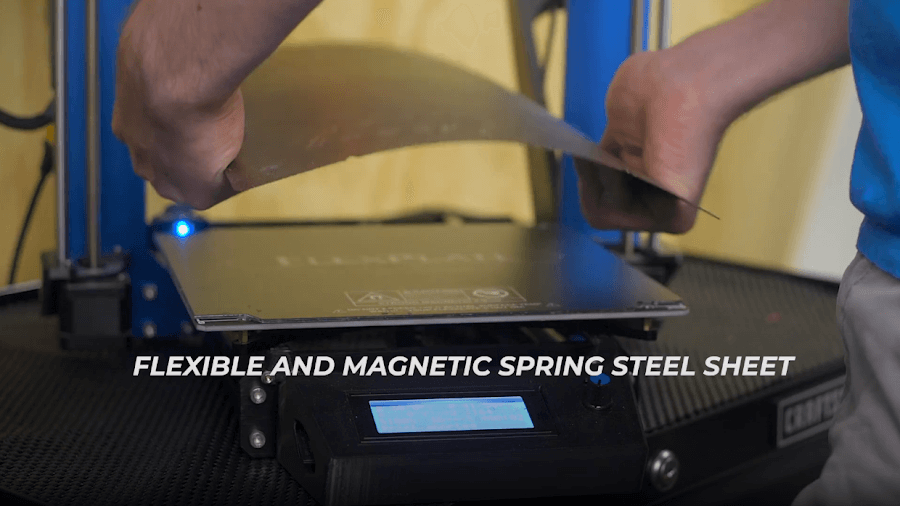
- Гъвкави и магнитни пружинни стоманени листове за лесно отстраняване на печат и смяна на материала
- Buildtak за универсален печат (избягвайте да печатате твърде близо или 3D разпечатките ще се заварят)
- PEI за универсален печат (използвайте PVA като освобождаващ агент за PET или гъвкави материали)
Имайте правилните инструменти
Докато изграждате своя умствен набор от инструменти за 3D печат, не забравяйте да вземете предвид и вашия физически инструментариум. Колкото повече 3D отпечатвате, толкова повече ще научавате кои инструменти са най-важни за вас, кои не работят толкова добре, колкото сте мислили, че ще работят, и къде има пропуски във вашия набор от инструменти. За да започнете, ето някои инструменти, които бих препоръчал:
- Шпатула. Шпатулата може лесно да проникне под 3D разпечатки, което ви позволява да премахнете вашите 3D разпечатки.
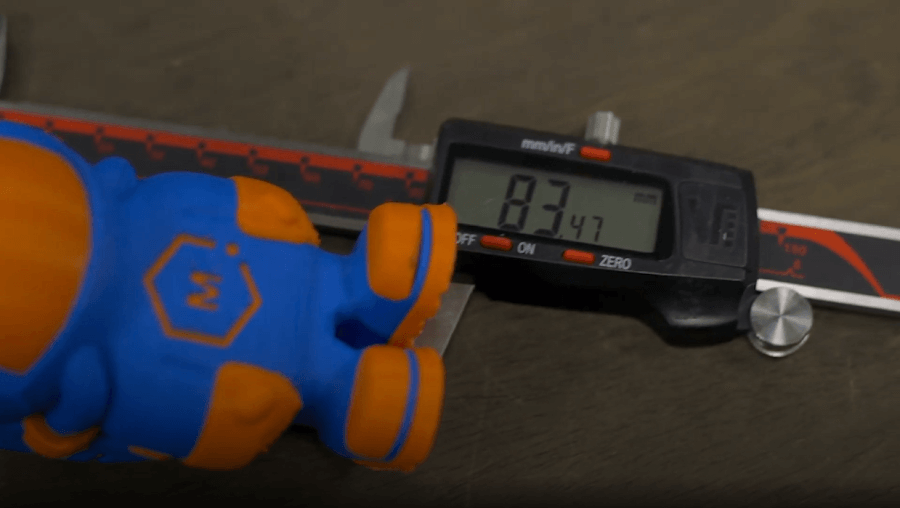
- Резци за кабели. Те са изключително полезни за премахване на поддържащ материал, за правене на хубав, чист разрез при подрязване на нишка преди зареждане и за изрязване на всички несъвършенства на вашите 3D разпечатки.
- Месингова четка. Месингът е достатъчно мек, за да не повреди дюзата ви, когато трябва да се почисти от всякакви натрупвания.
- Комплект шестостенни ключове. Когато трябва да отворите вашия принтер или да сглобите модели от няколко части, ще ви трябват различни шестостенни ключове.
Безопасност на остри инструменти
Насочете шпатулата си далеч от себе си, когато премахвате 3D отпечатъци. Доста лесно е 3D отпечатъкът внезапно да се освободи и цялата сила зад шпатулата отива в дланта ви. Опитайте се внимателно да обработите ъгъла на вашия отпечатък и плъзнете шпатулата под него, като работите по целия път около 3D отпечатъка. Ако това все още отнема твърде много сила без напредък, не го насилвайте с ръка, почукайте леко дръжката с дръжката на отвертка.
Или можете напълно да избегнете тези проблеми, като извършите някои надстройки или използвате различни лепила, за да улесните отстраняването на частта. Системата Buildtak Flexplate ви позволява да премахнете гъвкавата повърхност на леглото, за да може да я огънете и завъртите, за да извадите лесно готовите 3D разпечатки без инструменти. Или използвайте лепило като Magigoo върху стъкло, което залепва частите към леглото наистина силно, но изскача с нежно побутване, когато леглото изстине.
Макетните ножове са други остри инструменти, с които е лесно да бъдете невнимателни, когато се опитвате да почистите готови 3D отпечатъци, просто внимавайте с острите инструменти за вашата безопасност.
Задавайте въпроси
Всеки е начинаещи в един момент и да си лош в нещо е първата стъпка към това да бъдеш някак добър в нещо. Не се страхувайте да задавате въпроси, когато не разбирате какво не е наред. Като цяло общността за 3D печат е много отворена за подпомагане на новодошлите, така че ето някои полезни съвети, когато търсите насоки:
- Бъдете описателни. Дори и да не смятате, че това е част от проблема, все пак го обяснете. Много по-добре е да информирате прекалено много, отколкото недостатъчно, защото може би тази една настройка, която изглежда маловажна за вас, всъщност е цялата причина вашият 3D печат да не излиза правилно. Включете какъв 3D принтер имате, всички модификации към него, настройките за печат, материал и марка, лепило за легло, снимки или видео, всичко, което можете да предоставите, просто ще информира по-добре някой, който чете.
- Използвайте форуми за вашия 3D принтер или където и да е приложимо, за да поискате помощ.
- След като разберете как да поправите това, което се е объркало, не забравяйте да докладвате обратно на вашата първоначална тема и да актуализирате с това, което го е поправило. В крайна сметка може да помогнете на някой друг, който се сблъсква със същия проблем.
Бъдете гъба на знанието
Четенето на помощни форуми, публикации в общността или специфични за индустрията статии може само да помогне за по-нататъшното познаване на 3D принтерите, как работят и как не работят. Може би това, което четете, не се отнася за това, върху което работите в момента, но влиза в действие в бъдеще и ви помага да разрешите проблем, преди да се наложи да потърсите помощ.
Не се страхувайте да препечатате и да започнете отначало
Нажежаемата жичка като цяло не е непосилна за завършване на проекта. Грешките при 3D отпечатване трябва да са рядкост, като следвате стъпките, описани тук, но дори професионалистите имат почивни дни и бракуването на 3D отпечатък е нормално да се случи. Считайте всичко това за част от итеративния процес на 3D печат.
Тези съвети са добро място за начало, но има какво да научите, докато си проправяте път към титлата експерт по 3D печат. Информацията, предоставена тук, е помогнала на мнозина в тяхното пътуване с 3D печат и ако смятате, че има още нещо, което да добавите, което е било важно за вас, моля, оставете го в коментарите по-долу, за да могат другите да учат с вас. Честит печат!
0 Comments