In 3D printing, the infill plays an important role in the strength, structure and weight of the part. Read on to know more about it.
Unlike most other manufacturing techniques, 3D printing allows you to carefully control two mutually exclusive, yet complementary aspects of a part: outer walls (or perimeters) and infill. The walls, however thick, form the outermost regions of the part, while the filling is all that exists within them.
Although you have some control over the walls, the fill is much more dynamic and plays a huge role in strength, weight, structure, buoyancy and more. With 3D printing, you have the ability to define a number of parameters that govern the type of infill used for the parts. These parameters are set in a slicer program when a 3D model is translated into G-code instructions.
The most important of these parameters fall into two fundamental aspects: fill density and fill pattern. In this article, we'll cover the basics of these aspects, as well as some of the more common densities and patterns. But first, let's look at "infill" in a few different manufacturing methods to better understand how it works in 3D printing.
3D printing versus traditional manufacturing
Infill in 3D printing is different from other, more traditional manufacturing methods. Let's use injection molding and subtractive manufacturing as examples.
Injection molding involves inserting material into a mold to form a part. As you can imagine, due to the nature of this method, controlling the internal structures is simply not possible. As a result, injection molded parts are either solid or hollow (with gas injection), with no intermediate elements.
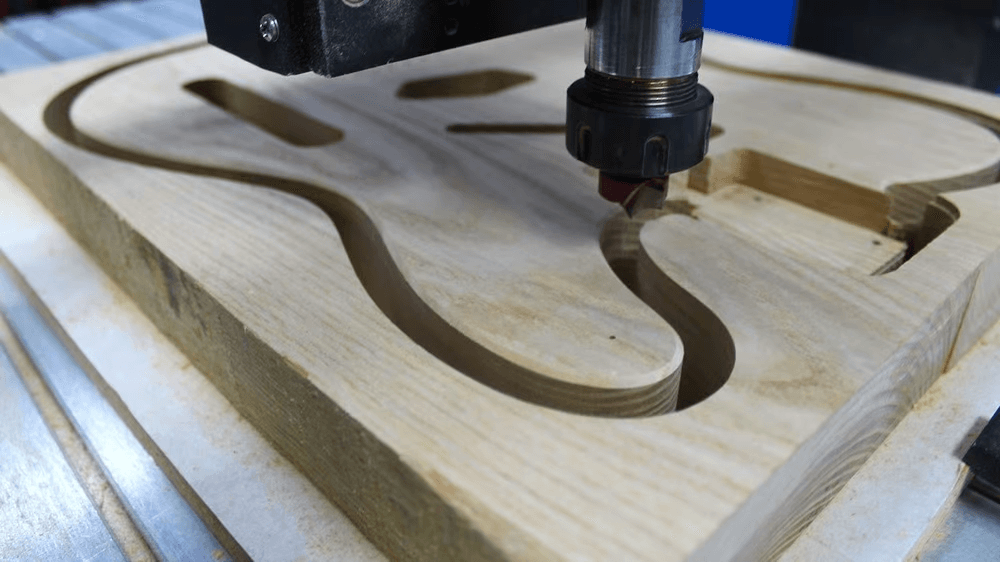
Subtractive manufacturing, like CNC machining, involves cutting away material from a larger piece of material. Like injection molding, the filling is not adjustable, so the inside is completely solid.
Meanwhile, 3D printing involves selectively extruding material into almost any model. Let's take a closer look at the different fill density and pattern options.
Density
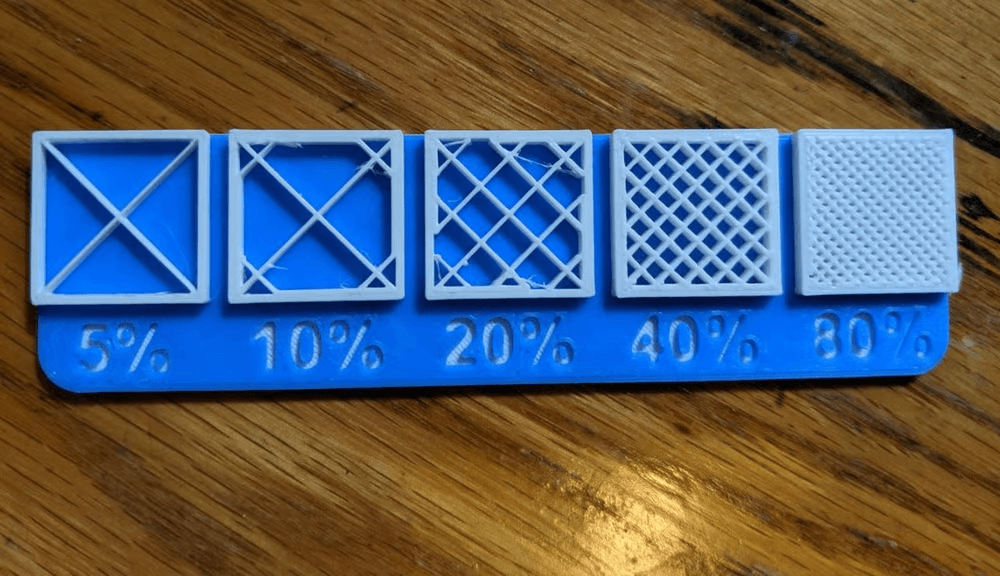
Infill density is the "fullness" of the interior of the part. On cutting machines, this is usually specified as a percentage between 0 and 100, with 0% making the part hollow and 100% making it completely solid. As you can imagine, this greatly affects the weight of the part: the fuller the interior of the part, the heavier it is.
In addition to weight, print time, material consumption and buoyancy are also affected by fill density. The same applies to strength, although in combination with many other elements such as material and layer height.
Some slicers also allow different filling densities in the same part. This is known as variable fill density, and specific settings in the slicing program allow you to specify any density changes you want for different areas of your print. We will return to this topic a little later.
What percentage should I use?
For most "standard" prints that don't need to be super strong, we suggest using a fill density of 15-50%. This density percentage keeps print time low, saves material and provides good strength.
Functional prints should be strong. So we recommend using a higher fill: more than 50% (don't be afraid to go up to 100%). The setting is very high, so be prepared to wait longer for printing and consume more thread. Payback will be a stronger and heavier part.
For small figurine models intended for display only, you should consider using a fill density of 0-15%. This value will result in fairly fast printing and won't use up a lot of thread. Patterns printed at this density range will be light and not very strong.
Finally, each fill density should work for the specific products (eg printed in flexible materials like TPU). Keep in mind, however, that the higher the fill density, the less flexible the part will be.
RECOMMENDED SETTINGS
- Standard printouts: 15-50%
- Functional Footprints: 50-100%
- Figures and models prints: 0-15%
- Flexible Footprints: 1-100%
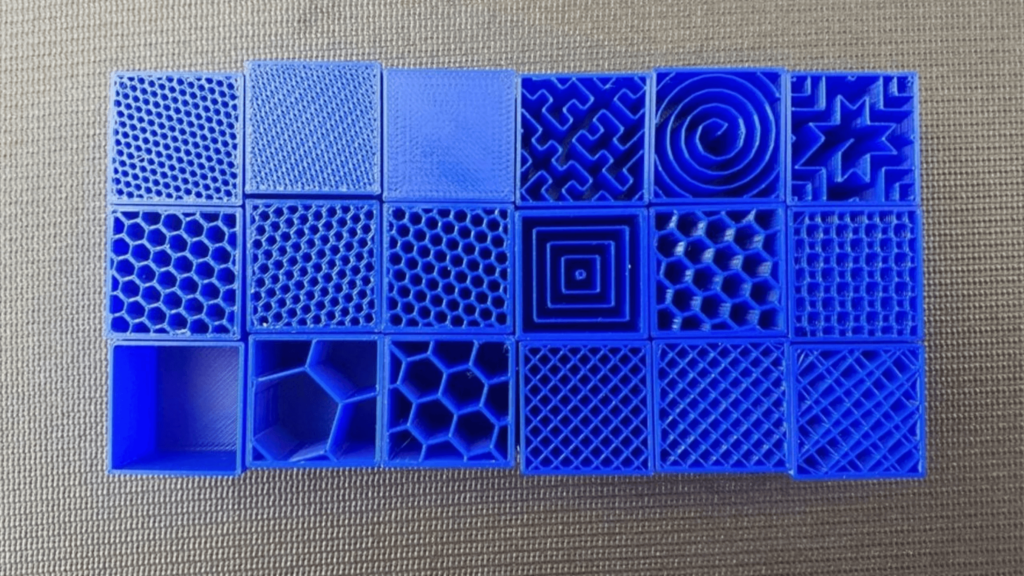
Model
The fill pattern is the structure and shape of the material inside the part. Ranging from simple lines to more complex geometric shapes, fill patterns can affect a part's strength, weight, print time, and even flexibility.
There are many different fill patterns in different slicing programs. For example, Cura (2.2) has a choice of 14 different fill patterns, while PrusaSlicer (2.5) has 17 and Simplify3D has 6.
Like fill density, some models are better than others for certain features. Different infill models have different attributes, such as complexity, material efficiency, and the number of bond strength planes (2D or 3D). For example, the model of the gyroid ( gyroid ) connects the walls in three dimensions, providing greater overall strength. As a result, this pattern takes up more material than patterns like lines.
Which model should I choose?
Make sure you choose a model that meets the needs of your part. Here's an overview of nine common options:
- Lines: The line fill pattern contains lines printed in one direction (X or Y axis) on every other layer. This fill pattern provides strength in only two dimensions and is good for quick prints. The line pattern doesn't use too much material and keeps the weight fairly light.
- Honeycomb: As the name suggests, this pattern creates a honeycomb structure, creating an attractive visual. This fill pattern is good for semi-fast prints that require moderate strength, and shouldn't use up too much material.
- Grid: The grid fill pattern looks similar to the lines, but instead of one-dimensional lines on each successive layer, it contains two-dimensional lines on each layer, with twice the space between the lines. This model provides two-dimensional power, but is still somewhat strong. The grid pattern consumes an average amount of material and takes an average amount of time to complete.
- Triangles: The pattern of triangles looks like overlapping triangular lines, with the lines running in three directions in the XY-plane. This fill pattern only provides strength in two dimensions, but still works for prints that need to be strong.
- Tri-hexagon: The Tri-Hex Fill Pattern contains a set of lines running in three directions in the XY-plane, creating hexagonal patterns with triangles in between. This fill pattern provides robustness in two dimensions and is quite decent for strong prints.
- Cubic: This pattern creates stacked cubes, but because they are tilted at 45 degrees around the X- and Y-axes, they look more like triangles at any given moment. The model provides excellent strength in three dimensions, but takes a little more material and time than others.
- Octet: The octet fill pattern is similar to the cubic pattern, but instead of increasing slanted triangles, the pattern is materialized as squares. This fill pattern is a 3D model that not only looks really cool, but is also useful for parts that require strength.
- Gyroid: The gyroid fill pattern might look the coolest, but it's also the weirdest fill pattern. It includes concave irregular curves that eventually intersect. It aims to achieve an optimal balance between strength, material and print time.
- Concentric: A concentric fill pattern is an internal structure composed of concentric lines that conform to the outline of a part (ie, its perimeters). This pattern prints quickly, is good for flexible parts, and uses significantly less material than most patterns.
RECOMMENDED SETTINGS
- Standard Prints: Grid or triangles
- Functional Footprints: cubic, gyroid or octet
- Figures and models prints: Lines
- Flexible Prints: Concentric
Other considerations
Besides pattern and density, there are two other notable categories of fill settings: variable settings and art patterns. Both allow you to be more creative with the fill settings. We've listed a description of each below.
Variable settings
Variable settings allow you to adjust fill density as the part progresses through the layers. For example, if you want the part base to have a 10% fill up to layer 30 and then switch to a 50% fill, the variable settings allow you to do that.
Here are some resources to show you how to do this in Simplify3D, PrusaSlicer, and Cura:
- Simplify3D: Variable fill settings are easy in Simplify3D. To learn how to do it right, they provide guidance on how to change settings in different sections of the model.
- PrusaSlicer: It is possible to adjust the variable settings, but it is a bit more complicated. You can try the "Adaptive Cubic" padding, which automatically adjusts the density depending on the proximity of the padding to the wall. For more control, try modifiers.
- Cura: Not much information is provided about this process, but it involves using support blockers to change the fill density. You can learn more about how to do this on the UltiMaker forum and Reddit.
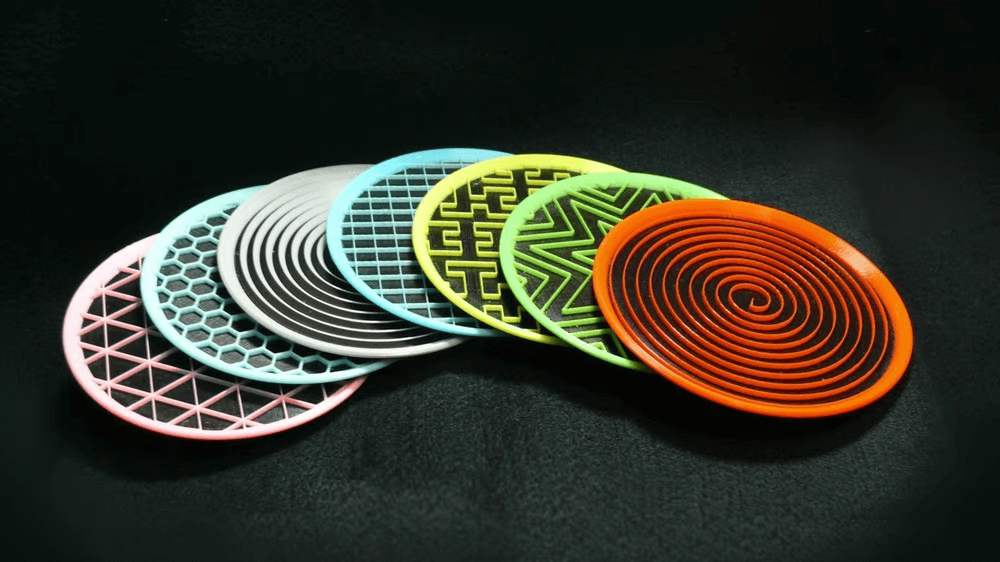
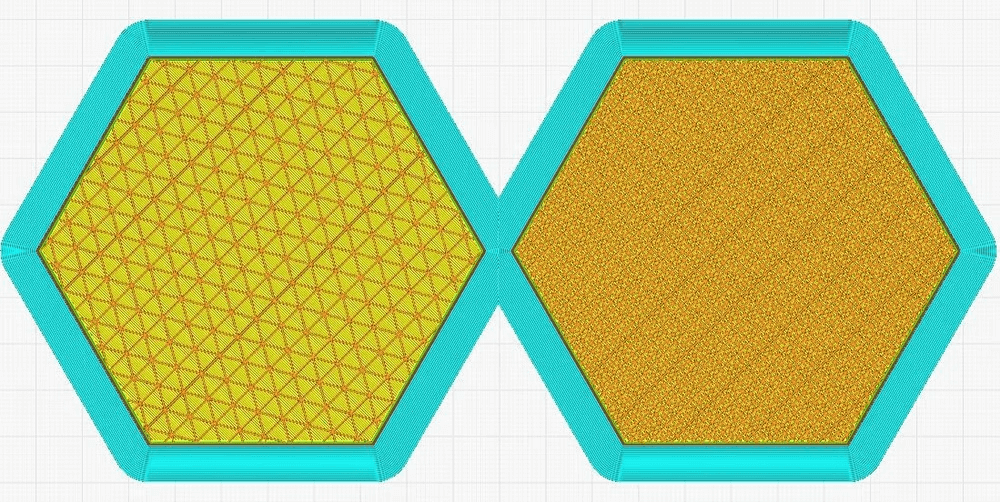
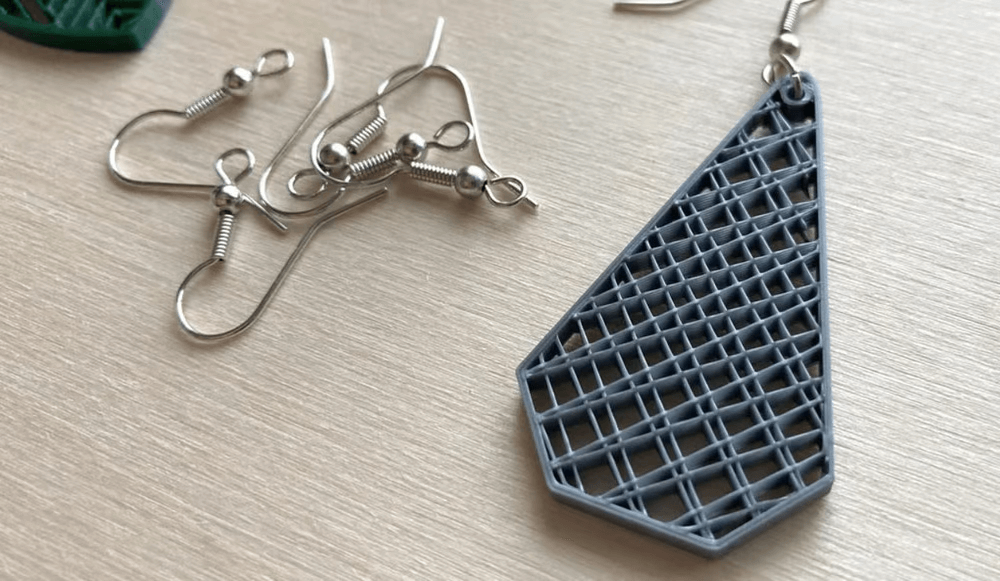
Art fill
Fill for Art is a way to turn different fill patterns into works of art. This process looks great on earrings, pendants and other jewelry, and artwork.
You can make this process work by removing the top and bottom layers to expose the filling patterns.
0 Comments