Proper 3D printer maintenance is essential to maintaining your operation and efficiency. Find out what is needed and why.
All production equipment requires maintenance, including desktop 3D printers. Manufacturers usually provide a small list of preventive maintenance actions, but unfortunately, people tend to delay, if not completely ignore, preventive maintenance.
However, there are a number of important benefits to implementing a routine maintenance regime. A properly maintained machine will perform as intended, if not better, and downtime can be avoided. The time and effort put into maintenance tasks can save hours of troubleshooting and even days and weeks of waiting for replacement parts to arrive. More importantly, regular maintenance is a critical safety factor, especially when working with desktop 3D printers.
In this article, we will provide an overview of the various actions required to keep FDM 3D printers in good shape, ensuring reliable and quality prints. Instead of detailed tutorials, we'll discuss the basics, including why each method is important.
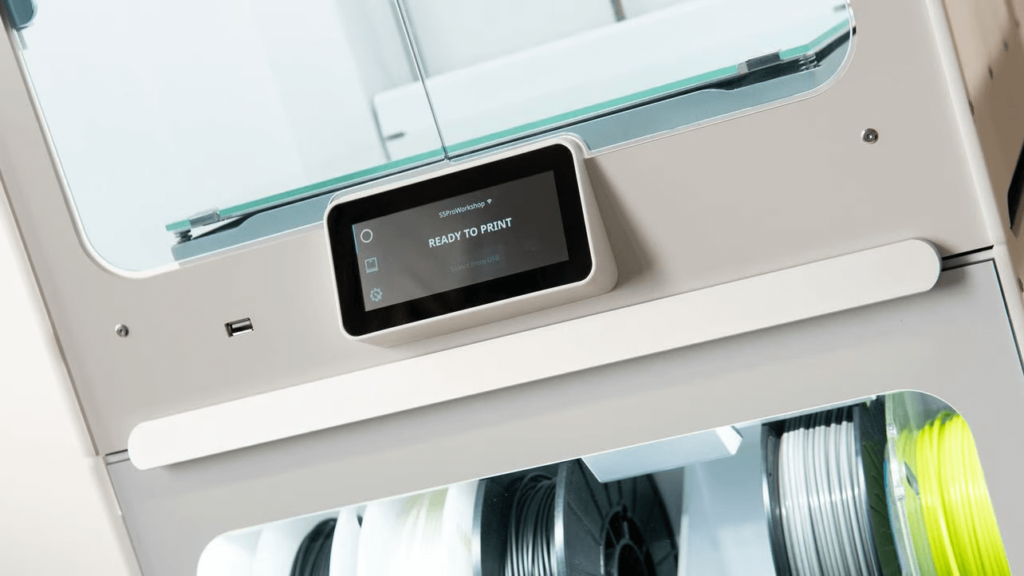
Toolkit
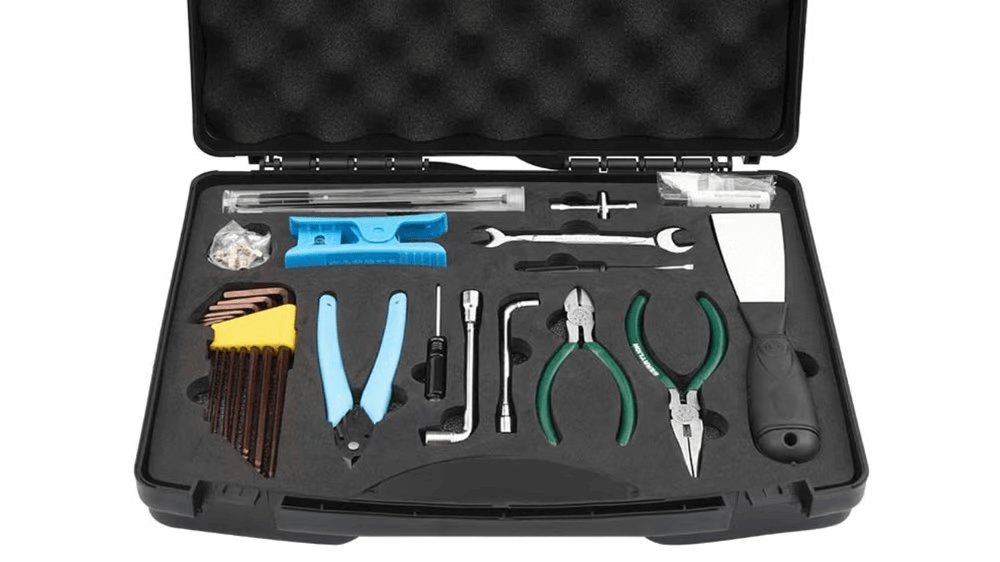
Before you get started, it's probably a good idea to have a good set of tools handy. It will definitely make life easier. The basic kit should include the following:
- Screwdrivers, hex keys and pliers
- Wire brush (optional but recommended)
- Tech. grease or tech. axle and guide oil
- Cleaning materials such as towels and IPA
- A small brush for cleaning dust from electronics
PREVENTIVE
Preventive maintenance refers to routinely performed tasks that keep the machine running smoothly and reduce the likelihood of unexpected breakdowns. It also extends the life cycle of components, reducing the costs associated with the eventual replacement of these parts and the downtime required to perform this work.
The frequency of preventive maintenance checks depends on the frequency of use: The more often a machine is used, the more often preventive tasks need to be performed.
I. Light cleaning and inspection
First, take a moment to inspect the machine and its major components. To accurately assess any damage and potential problems, some cleaning is helpful. For now, a simple dusting should be enough.
All electrical cables and connections should be checked for damage and that they are securely connected. Pay special attention to the hot end and heated bed connections as they draw higher current, which is a potential fire hazard.
Mechanical components should also be checked for wear. Screws should be retightened if necessary, especially those attached to plastic parts that tend to loosen over time. Check all screws on the belt pulley and tighten if necessary.
For V-slot 3D printers, such as most Creality printers, be sure to check the wobble sleds (both bed and print head); this can happen if the wheels are too loose. Alternatively, if the wheels are too tight, the carts may not move smoothly. Tighten or loosen the wheels as needed (if needed at all).
FAILURE TO COMPLETE THIS TASK MAY RESULT IN:
- Dust accumulation and traffic disturbance
- Electronic malfunction due to damaged cables and connectors
- Vibrations and ringing
II. Axle and guide checks
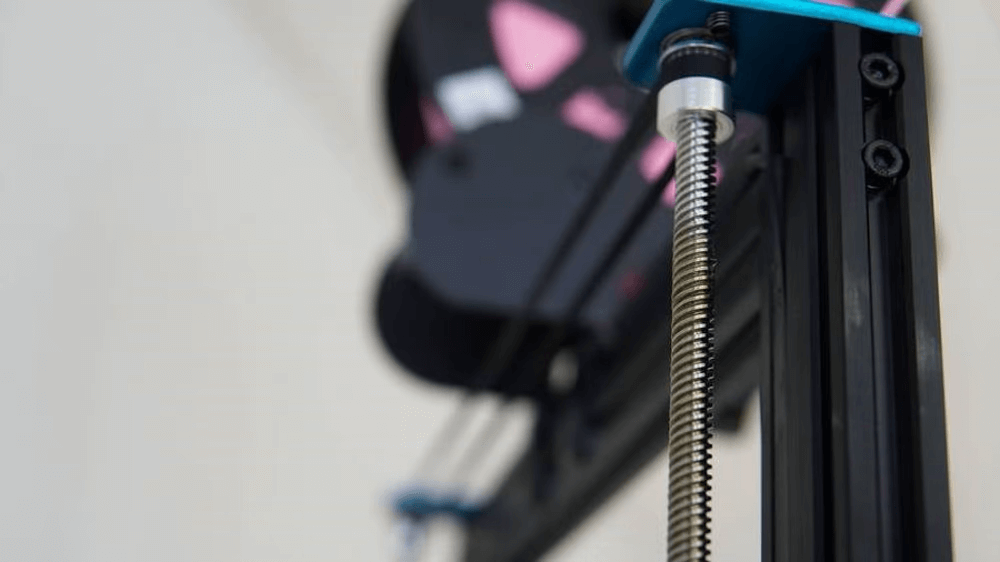
Linear guides provide smooth and precise movement along the axes. When properly maintained, they can improve overall print quality, as FDM is highly dependent on well-controlled linear motion.
There are also fire safety benefits. Mechanical friction and motion disturbances will require more torque from stepper motors, often resulting in overheating.
Both linear rods with ball bearings and linear rails with carriage slides require some type of lubrication to reduce wear generated by friction. In fact, depending on how long these components have been running without lubrication, it may be a good idea to check for replacement. Lubrication of the lead screws (usually along the Z-axis) is also recommended, although it is also often neglected.
CHOICE OF LUBRICANT
There are literally dozens of different greases, so be sure to check what your 3D printer manufacturer recommends. That being said, common lubricants for 3D printers include white lithium greases and dry lubricants such as silicone and Teflon.
Note that WD-40 no is a lubricant! Applying it to your linear rods and rails can even remove the grease.
FAILURE TO COMPLETE THIS TASK MAY RESULT IN:
- Too much noise
- Layering lines on the printed object
- Overheating of stepper motors
III. Belt tension release
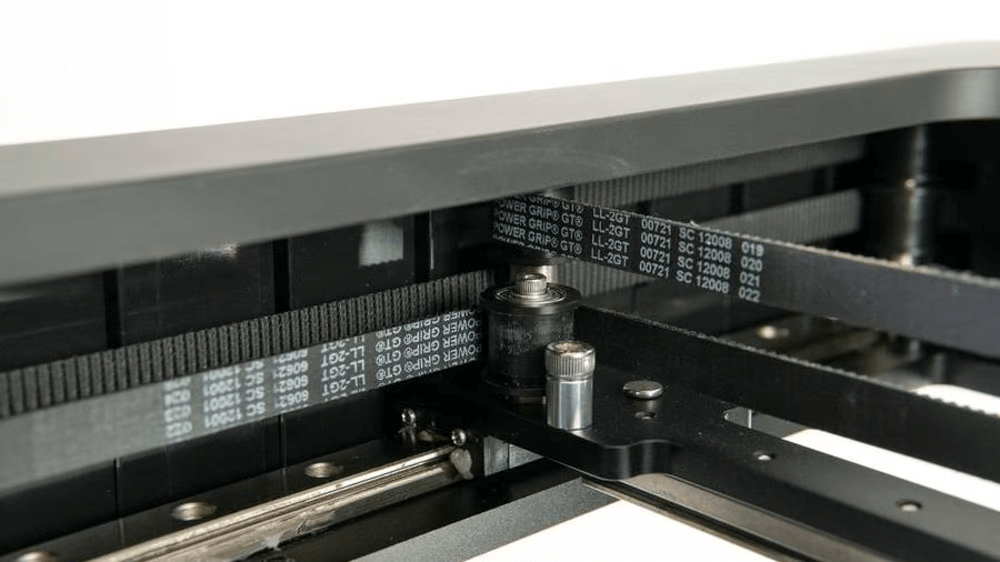
Most 3D printers use timing belts in at least two axes. Belts transmit motion very efficiently, but must be properly tensioned.
If they are too loose, the belt can sag and even miss the teeth. Additionally, they will not respond well to sudden changes in speed and direction, with surface quality degradation particularly noticeable at higher print speeds or heavier setups such as direct drive extruders. Too tight - motors will be stressed and overheat.
BELT TENSION ADJUSTMENT
The drive belts used in desktop 3D printers are usually made of rubber and are sometimes reinforced with fiberglass or steel. Regardless of construction, they will eventually lose tightness and require adjustment. To help with this, some manufacturers, such as Prusa, provide tension guides.
Many desktop 3D printers have built-in belt tensioners that are fairly easy to use and usually require a simple screw adjustment. Other machines may require some tinkering to adjust the tension. If this is your case, maybe consider printing and installing a tensioner; there are many models on Thingiverse.
FAILURE TO COMPLETE THIS TASK MAY RESULT IN:
- Shift the layer
- Clearance problems
- Improperly sized printouts, larger or smaller than they should be
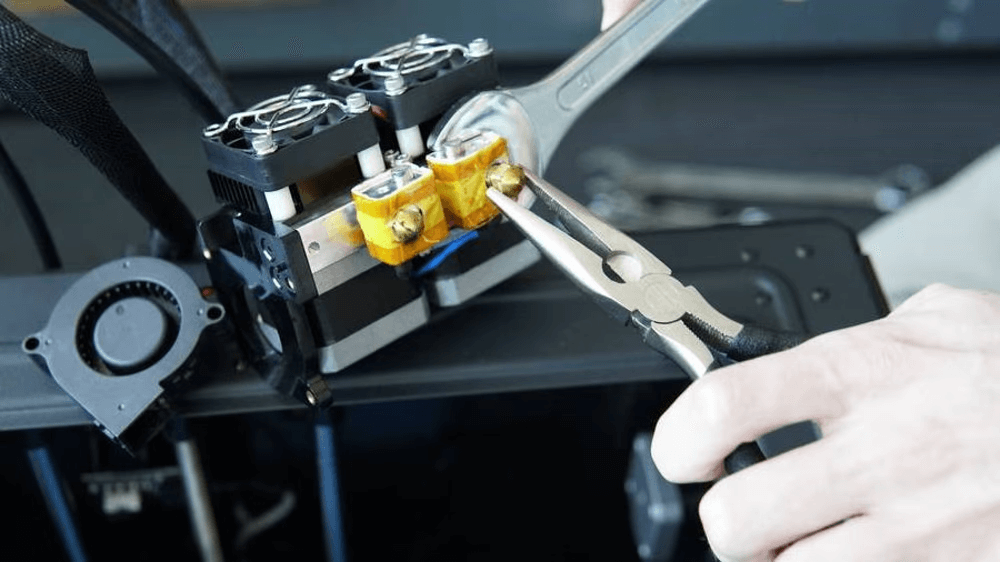
IV. Care of nozzles

Pay special attention to the nozzle of your printer. This is obviously one of the most important parts of an FDM 3D printer, but even so, people tend to overlook it until it gets stuck.
Even without clogging, the nozzle can get quite dirty externally. This can potentially ruin the seal with stains and also fill the room with that awful smell of burnt plastic.
ROUTINE NOZZLE CLEANING
Try to keep the nozzle as clean as possible. Heat it up and use a wire brush to remove all the melted and unmelted plastic that has built up from successive impressions. Small pliers or thick rags can also be used, but just be careful not to burn yourself.
While you're at it, clean the heating block as well and maybe consider adding a silicone coating to it.
Note: If you are using a wire brush, it is recommended that you turn off your printer, as the extra metal can cause a short circuit between the power components. (There have even been reports of some damaging their motherboards.)
CLOGS
Sometimes the nozzle is only partially blocked and this is a little harder to catch. Although there are some threads on the market specifically for cleaning, if you suspect a clog, try cold pulling. Alternatively, you can increase the nozzle temperature as high as possible and feed through some high temperature filament such as ABS or PETG.
Last but not least, proper replacement of the filament is very important. To prevent clogging, be sure to set the nozzle temperature according to the material with the highest print temperature.
FAILURE TO COMPLETE THIS TASK MAY RESULT IN:
- Extrusion issues such as under-extrusion and over-extrusion
- Clogging and leaking
- Spots and pimples
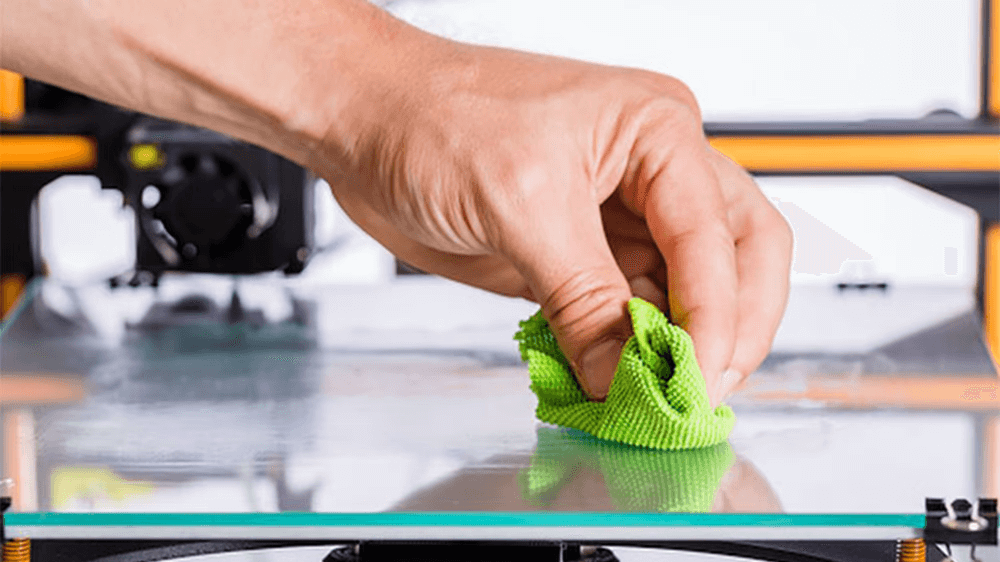
V. Build Platform Verification
Adhering the first layer correctly is a top priority for FDM 3D printing. Without it, parts can separate in the middle and corners can warp, especially when printing on temperature-sensitive materials like ABS. Regardless of the strategy used to adhere prints to the bed, be sure to keep it as clean as possible.
Dust and dirt accumulate very easily, and even the organic oils present in our fingertips are enough to destroy the adhesion of the plastic. A cleaning alcohol such as IPA is recommended for glass beds.
Using glue is a common solution, but it can build up in thick layers, requiring you to scrape and wash the build plate with soap in a sink. For those using tapes or special adhesive stickers, check for damage and replace when necessary.
BED LEVELING
After cleaning, make sure the bed is level. This is also a good idea even when using auto-leveling. For those using high thermal shrinkage materials such as nylon or polycarbonate, perhaps PEI sheets or a hardware upgrade such as a new heated bed may be appropriate.
FAILURE TO COMPLETE THIS TASK MAY RESULT IN:
- Distortion
- Uneven first layers
- Poor adhesion of the first layer
VI. Thread care
Small particles of dust may accumulate on the filament depending on how the spool is stored or how long it has been in the printer. These particles can be so small that they often go unnoticed, but they can affect your prints and nozzles.
Proper storage may be just what is needed to prevent particle build-up. Moisture protection is an added "bonus".
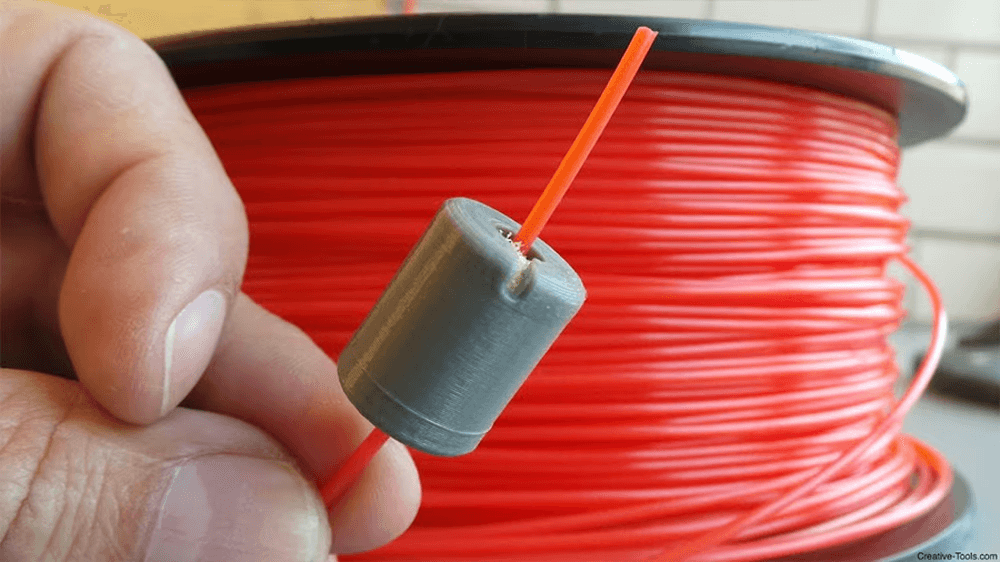
DUST FILTERS
For filaments already loaded into a machine, dust can collect quite quickly, especially in a shop environment or 3D printers located next to a CPU. So-called sponge filters, which are attached to the filament before the extruder, can be used to capture dust as the filament passes through.
The filters are DIY and many other models are available on Thingiverse. Some users even put a little oil on the sponges to lubricate the stiffer filaments like PLA on long Bowden tubes. However, the effectiveness of these oil filters is much debated.
So consider adding a dust filter to your printer. We can promise that you will be surprised by the amount of dirt it captures. Just remember to clean and replace the sponge periodically as part of your preventative maintenance routine.
FAILURE TO COMPLETE THIS TASK MAY RESULT IN:
- Clogged nozzles
- Friction buildup on Bowden tubes
- Stringing due to moisture-filled threads
VII. Calibration
Many of the preventive maintenance tasks covered so far involve disassembly and adjustments. The last step is to make sure the machine is working well.
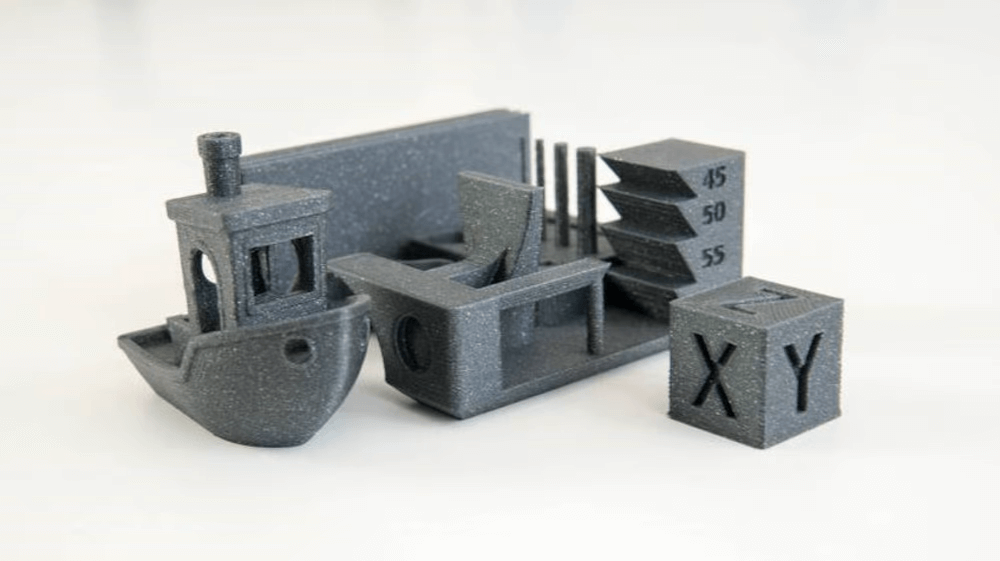
If you feel confident that everything is working, start with a simple print like an XYZ calibration cube. This is a good way to check bed adhesion and surface quality while allowing you to assess what else needs to be corrected.
If it has been a long time since your last in-depth calibration, we strongly recommend that you go through the full calibration process, including the extruder steps per millimeter.
Complete your calibration by printing the good old 3D Benchy. Check the print for quality, accuracy, cleanliness and other characteristics.
If by any chance something goes wrong during your test prints, this is the time to troubleshoot.
FAILURE TO COMPLETE THIS TASK MAY RESULT IN:
- Low quality prints
- Extrusion issues such as under-extrusion and over-extrusion
- Overheating
PLANNED
Planned maintenance differs from preventive maintenance in that it occurs less frequently, is not oriented toward routine equipment checks, and generally requires more effort. For desktop 3D printers, this includes tasks and issues that are typically more difficult to evaluate, as we'll see below. Nevertheless, these are important actions that will contribute to higher productivity and reduce unexpected problems.
VIII. Changing nozzles
Even with the routine hot nozzle cleaning discussed above, the standard brass nozzles on most FDM 3D printers wear over time, both externally and internally. This is often accelerated for those printing composite materials such as carbon fiber and metal filament.
Since the nozzle degrades over a long period of time, it is quite difficult to notice this damage. Although there are no sudden changes in print quality, a subtle deterioration occurs print after print. For this reason, it is very important to schedule changes throughout the year to ensure that the nozzle will always be in good condition.
REPLACEMENT FREQUENCY
How often the nozzle should be changed depends on the use. A well-maintained nozzle used only with PLA can last a long time, but as a general rule, replacements should be done every three to six months. To avoid special calibration, it is a good idea to perform the replacement while performing the preventive maintenance tasks described above.
TYPES OF NOZZLES
Brass nozzles are inexpensive and suitable for non-abrasive filaments such as PLA and ABS. If you are printing with abrasive composite materials, you should consider changing to another type of nozzle that is specifically designed to work with these materials. Upgrading to E3D or Olsson Ruby hardened steel nozzles will greatly reduce how often you will need to replace nozzles on your 3D printer.
IX. Complete cleaning
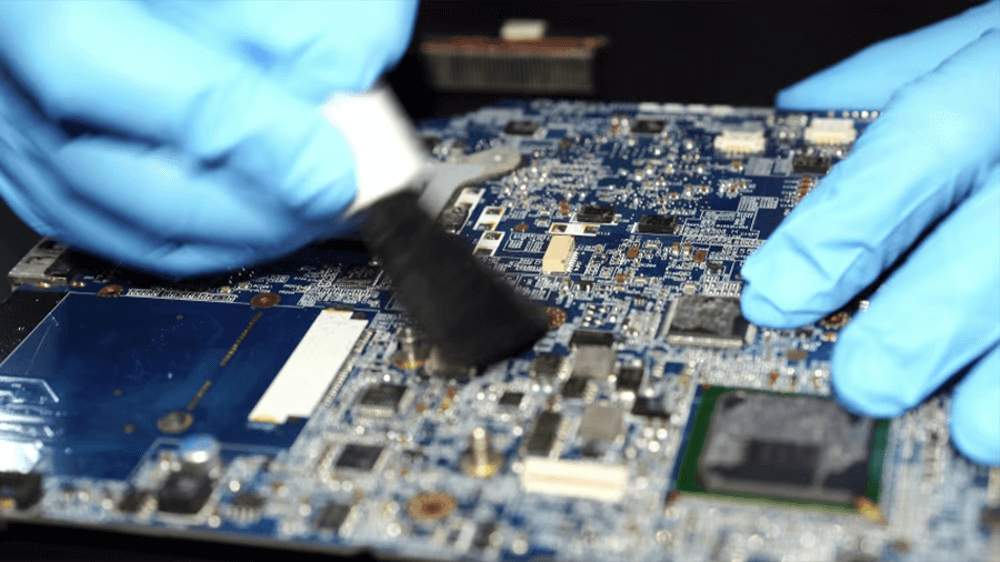
This scheduled maintenance is a very deep clean targeting "hidden" components such as electronic boards and fans. These parts can collect dust just as much as others and usually go unnoticed because they are usually covered.
Fans usually collect dust, but not in a good way: their rotation can be disrupted or their ducts blocked. Due to moisture and organic materials, dust can also damage electronic boards, which can lead to malfunctions and performance problems. The thermal management properties of the board may be further impaired.
Dirt builds up on the extruder gears: This is usually fine plastic dust that comes from grinding the filament. Many 3D printers make this compartment accessible, so it may not require much effort in the end. However, accessing the electronic boards and fans will require some disassembly.
A small, simple brush is usually enough to take care of these problems.
X. Firmware Updates
Last but not least, be sure to check your 3D printer's firmware for updates. Some manufacturers, such as Prusa Research, release software updates more frequently than others, but for most printers this usually happens every six months.
Although manufacturers usually recommend having the latest software running on your printer, the update process can be time-consuming and sometimes not worth it. Regardless, the process of checking for firmware updates and considering whether an upgrade is worth it should be treated as a maintenance step in itself.
While you're at it, don't forget to check your favorite slicer for updates too. Well-maintained slicers usually try to keep up with new and improved printer features and accommodate them, so you don't want to be left behind.
0 Comments