Proper cleaning of the 3D printer bed is essential for successful prints. Learn three easy ways to clean your 3D printer bed!
3D prints can fail for a variety of reasons, one of the most common being a part that separates from the print bed mid-print. Thus, ensuring proper bed adhesion is critical to successful printing.
While there are many ways to ensure that your parts stay glued, one of the easiest methods is to keep the print bed clean. Regular cleaning of the bed will not only improve the adhesion of the parts, but it can also make your prints look better!
In this article, we'll look at the best cleaning techniques for some of the most common bedding surfaces: PEI, glass, and tape. Be sure to use caution when using these techniques, as spilled liquids can seriously damage the printer. We also recommend removing your bed from the printer (if possible) before you start cleaning.
Now let's begin.
PEI Sheet
PEI (polyetherimide) sheets are becoming a popular option for improving bed adhesion. They provide excellent adhesion to a variety of materials and easily release most prints when they cool. The sheets are also easy to use and usually do not require additional adhesives (such as glass glue or tape) to apply.
Unfortunately, PEI Sheet also requires regular cleaning to ensure maximum adhesion. Repeated touching of PEI Sheet leaves grease on the surface which reduces its adhesion. Rough scraping of the PEI Sheet can also damage the surface and reduce its adhesion. Fortunately, regular cleaning and care will ensure that your prints will continue to stick.
HOW TO CLEAN IT
We recommend using unscented IPA at a concentration above 70% to clean PEI Sheet. Wait for the bed to cool, then liberally apply the IPA to a dry napkin or paper towel and wipe the surface. This will clean most of the grease on the PEI Sheet.
Acetone also works well to dissolve any residual plastic on the bed. Simply dampen a cloth with acetone and gently wipe over the surface of the bed. We strongly recommend that this be done in a well-ventilated area, as acetone is highly flammable and fumes can seep into the printer's electronics.
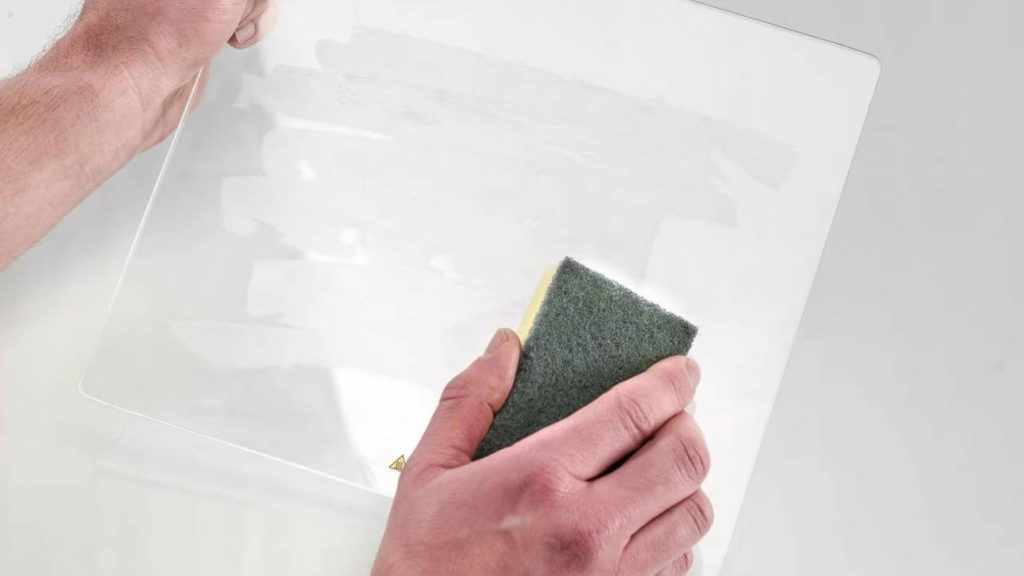
If you have been using your PEI Sheet for a while, we recommend sanding it with fine sandpaper (1500+). Gently rub the sandpaper over the sheet in smooth, even circles to remove light scratches and dents.
WHEN TO CLEAN IT
The best time to clean your PEI sheet will depend on the specific brand you are using and the level of printing. Most manufacturers recommend wiping with IPA every few impressions for maximum adhesion. After a few months of printing, try cleaning with acetone and sanding to renew the printing surface.
When you can no longer restore the print surface using the above techniques, you will probably need to purchase a new PEI sheet. The time frame for these replacements can vary from monthly to yearly depending on your printing activity and the brand of sheet.
Glass
Glass is another common bed material. Much more durable than PEI and other applied surfaces. Glass beds are known for providing a smooth, flat surface at the bottom of the print.
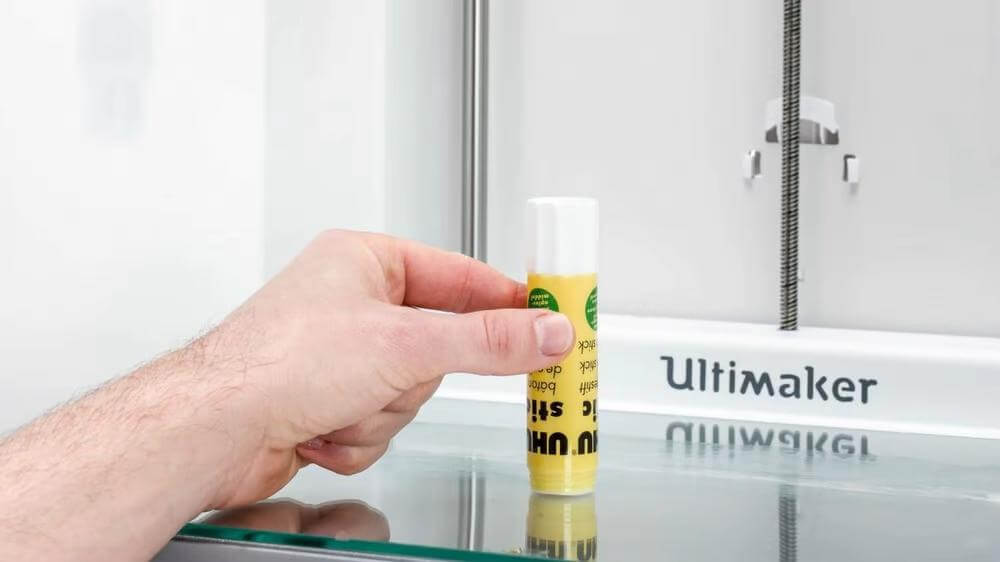
These beds are usually used in conjunction with other adhesives, such as glue or hairspray, to increase adhesion. Especially with unheated beds, glass alone is rarely enough to ensure that the print sticks. Therefore, regular cleaning is necessary to prevent the build-up of these adhesives.
Although this section focuses on glass beds, also note that some of these steps may apply to other types of beds.
HOW TO CLEAN IT
The easiest way to clean the glass bed is with a spatula / scraper /. If possible, heat the bed until the residual material is as soft as possible and easy to remove. Then use a spatula to remove the residue.
Remember to be careful when scraping: the blade may be sharp enough to injure yourself or damage the printer. We recommend placing one hand on the handle of the spatula and the other in the middle to apply more downward force. This will also reduce the chances of losing control of the blade.
If scraping is not effective, try scrubbing the glass with soap and warm water. Although simple, this technique is very effective at removing hairspray and other adhesives.
Like cleaning with a spatula, you will probably need to apply force when using this method, but be careful! Also, note that this technique is only recommended if you are able to remove the bed from the printer. Spilled water can seriously damage the heating unit, power supply and other delicate electronics of the machine.
A specialized cleaning solution can also provide highly effective and long-lasting cleaning. Sterile alcohol pads, window cleaner, and high concentrations of IPA are effective in dissolving residue and restoring the glass surface. However, be sure not to use too strong a cleaning solution. You can seriously damage the bed, the printer, or any adhesives you may be using. For best cleaning practices for your particular machine, contact your manufacturer.
WHEN TO CLEAN IT
Once again, the best time to clean the bed will depend on your individual printing habits. In general, we recommend scraping the bed after each print to avoid residue build-up. After the prints stop sticking (usually after about a month), try scrubbing with soap and water. After approximately two to four months, you will likely need to resort to IPA and other specialized cleaning solutions.
Adhesive tape
MatterHackers )
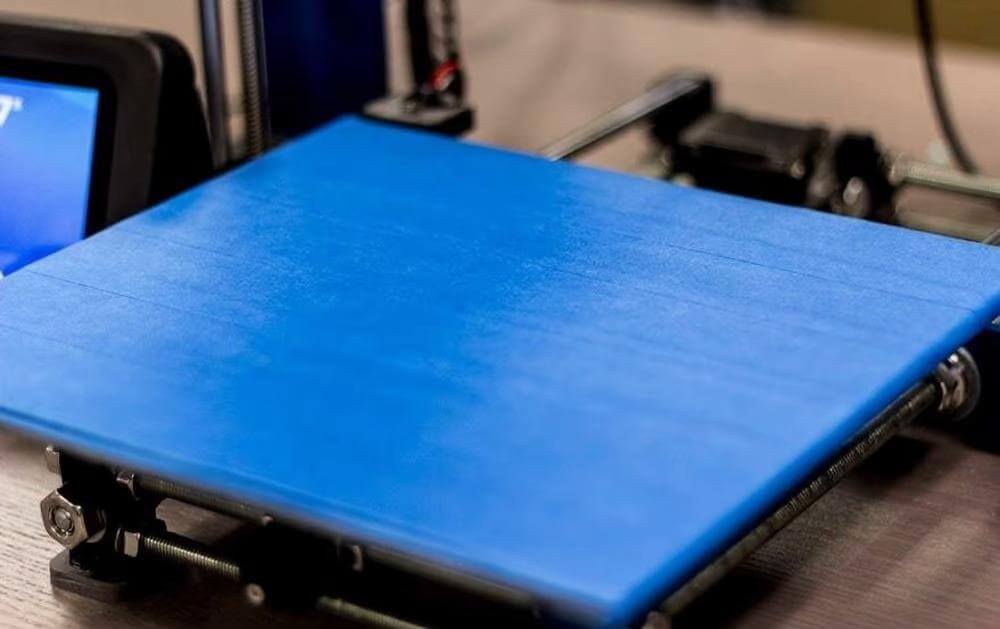
Adhesion tape is another proven method of increasing bed adhesion. Today, it is most commonly found on printers with unheated beds. Duct tape and masking tape are the most common types of tape, although kapton and other tapes are also used by some.
Part of what makes duct tape so popular is their ease of use. They are very easy to apply, relatively inexpensive, and available at most hardware stores. However, adhesive tapes have disadvantages: the tape often peels off when a print is removed, so it must be reapplied regularly.
HOW TO CLEAN IT
Unfortunately, adhesive tape is one of the most difficult bed adhesives to clean due to its fragility. However, we've found that gentle scraping is one of the most effective ways to clean it. Simply scrape the surface of the tape with a putty knife to remove any remaining fingerprints. Be sure to scrape evenly and lightly so as not to tear the tape.
When cleaning, you should also tape off any areas of the bed that have come off or torn. Holes often appear in the center of the bed where parts are most often removed. However, be careful not to apply too many layers when mopping as this can make the surface of the bed uneven.
If you find that your tape looks like a piece of Swiss cheese, it's probably time to re-cover the entire bed. Begin by peeling off and scraping off the previous layer of tape. Then clean the bed underneath with soap and water to remove any glue residue.
Once the old tape is removed and the bed is clean and dry, you can apply a new layer of tape. Try to do this with as few pieces as possible, carefully stretching the tape across the bed. Then gently press any air bubbles from the bottom of the tape until the surface is as flat as possible.
WHEN TO CLEAN IT
Due to its fragility, adhesive tape will need to be replaced much more often than other adhesives such as PEI. In general, we recommend lightly scraping the bed after each print to remove any adhering threads. Depending on the frequency of printing, you may need to adjust the bed on a daily, weekly or monthly basis.
And that's all about cleaning the 3D printing bed! 😉
0 Comments