
Slicers offer many infill options, but not all of them produce strong 3D prints. Read on to learn about the strongest fill patterns!
If you have a 3D printer, you're probably familiar with infill / the filling/, which allows the printed patterns to be solid, hollow, or something in between the previous two options. Infill is something unique to 3D printing, as conventionally produced parts are usually completely solid or hollow.
Fill Density and Fill Pattern are two filter settings that determine how the 3D printer will print the fill. Both of these settings greatly affect the mechanical properties of the printed object, so you'll want to pay attention to these settings if you want to print strong parts. However, it is also important to keep in mind that many factors other than fill affect the strength of the impression (material and shells, for example).
In this article, we will focus on fill patterns, specifically those that are likely to produce strong prints. To guide our discussion, we will use some of the best models available in popular slicers such as Cura and PrusaSlicer. Before we do anything though, let's first discuss fill density and template settings.
All about Infill
Essentially, fill density refers to how dense the interior of the 3D print is. This is usually expressed as a percentage: 100% will be fully solid, while 0% will be hollow. The fill pattern is the shape of the fill structure inside the print.
Generally, the higher the fill density percentage, the higher the strength (as well as material consumption, weight and print time) and the lower the flexibility. But the fill pattern can also affect the force depending on how the structure and arrangement of the lines disperses the internal forces. Thus, just like other settings (eg layer height), different models are useful for different applications.
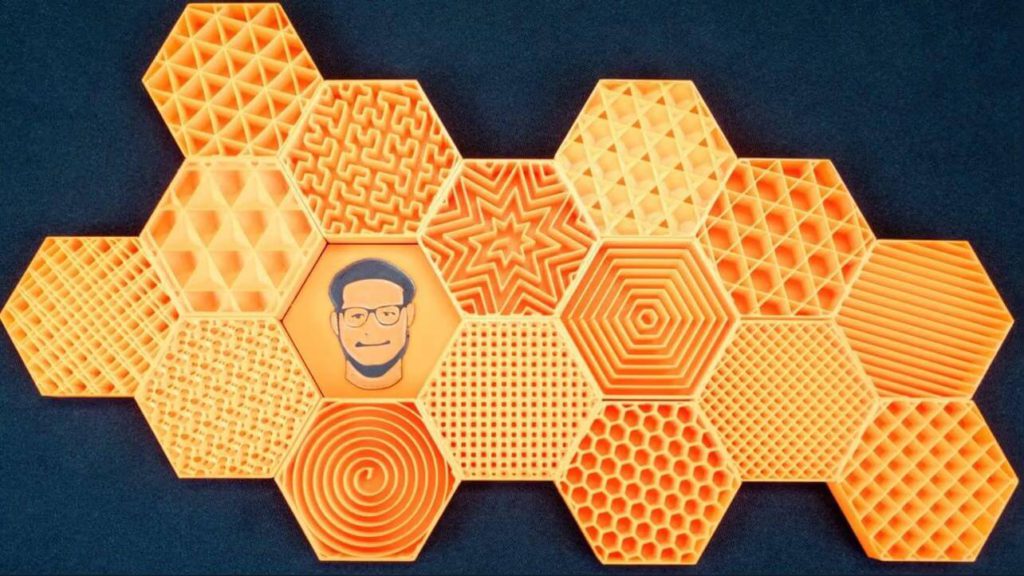
There are many filler patterns available in a variety of cutting platforms, but only a few are designed to produce high-strength components. Most of these—like the lines, zigzags, and criss-cross patterns—are designed for regular prints that won't face a lot of physical stress, but still need to be somewhat durable.
Considerations
In order to judge which fill pattern produces the strongest parts, there are several important considerations to discuss. The first is the strength of the fill pattern direction and the second is the type of strength measured in testing.
Directional power
Not all models provide equal force in all three axes (X, Y, Z) and many are better suited for certain planes. For example, the mesh model offers great strength along the Z axis, but is weaker throughout the XY plane. To get the most out of patterns that are strongest along certain axes, consider orienting your pattern so that the part of the print that needs to be strong is aligned with the axis where the fill pattern is strongest .
There are also models that provide more balanced power along all three axes. Unfortunately, because the force is more spread out, the strength of the individual axle is reduced. For example, the fill pattern of Gyroid provides mostly balanced strength in all three directions, but is not the strongest model in the Z axis.
Types of power
Sculpteo)
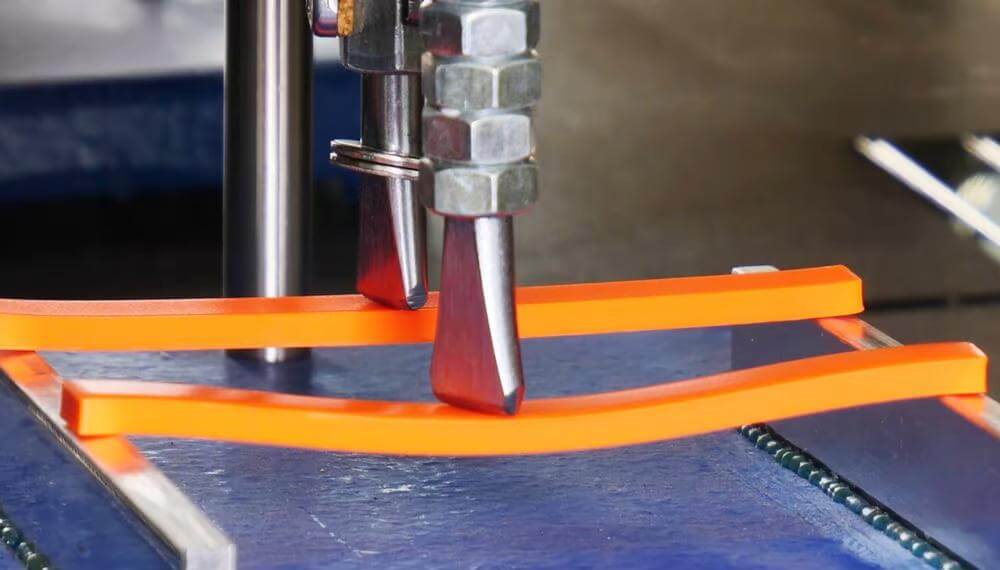
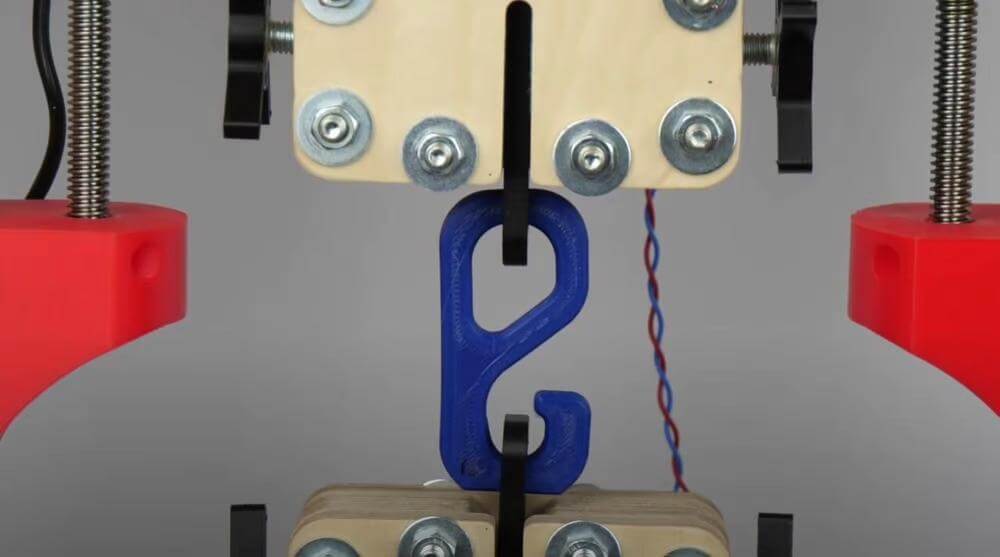
The second important consideration is the type of force measured when testing an infill pattern. Later in this article, we will present each of the strongest models and their results in two testing methods: extension and compression. The former involves applying force to two ends of a pattern to tear it apart, while the latter is applying downward force to a pattern, squeezing it until it breaks.
Both tests are valid ways of determining the strength of a fill pattern. The extension test determines the tensile strength and the compression test determines the compressive strength. Both types of strength can be quantified by their breaking load, which is how many kilograms (kg) can be applied before a pattern breaks. For 3D printed models, the load in the compression test is almost always greater than that in the tension test.
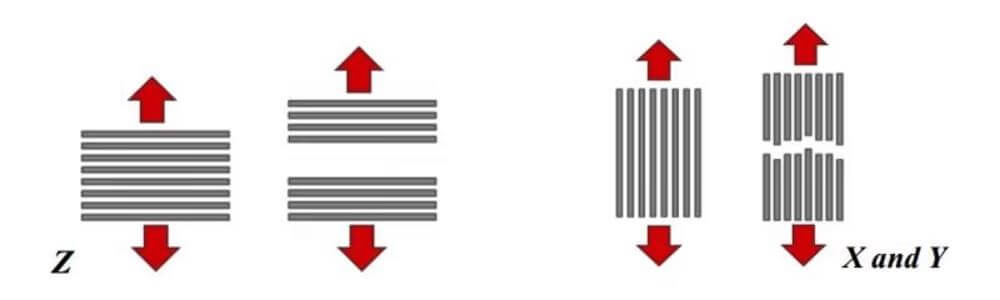
All of the studies included in this article conducted strength tests along the Z axis of the prints. Whether a tensile or compression test, each is performed against the printed pattern in its original orientation. For example, if you print a cube and run a compression test, you will compress the top of the cube.
One of the studies also tested the strength of the parts along the X and Y axes. Identical parts were rotated 90 degrees and subjected to the same compression test as performed for parts in their original orientation. Testing both the XY-plane and the Z-axis gives a more comprehensive picture of the overall strength of the part.
The tests
Before we go through the patterns, it's important to mention that we used empirical evidence from three different reputable tests to determine the strongest fill patterns. Because they provide an unbiased and objective view of the best fill patterns, we've included the following tests:
- Steam Labs' 3D Printed Compressive Strength Comparison
- CNC Kitchen Infill and Shell Thickness Strength Test
- CNC Kitchen Infill Pattern Strength Test
Of course, there are many other strength tests for 3D prints and infill patterns, but we chose these three because they all present the data in the same unit of measurement (breaking load in kg). The studies also use professional testing methods and keep the environment (printed material, fill density, printer used, etc.) the same for each individual model tested.
The contenders
Now that you know a little more about padding and strength types, it's time to review the strongest padding patterns. Below we discuss the six most powerful models that can be found in Cura or PrusaSlicer.
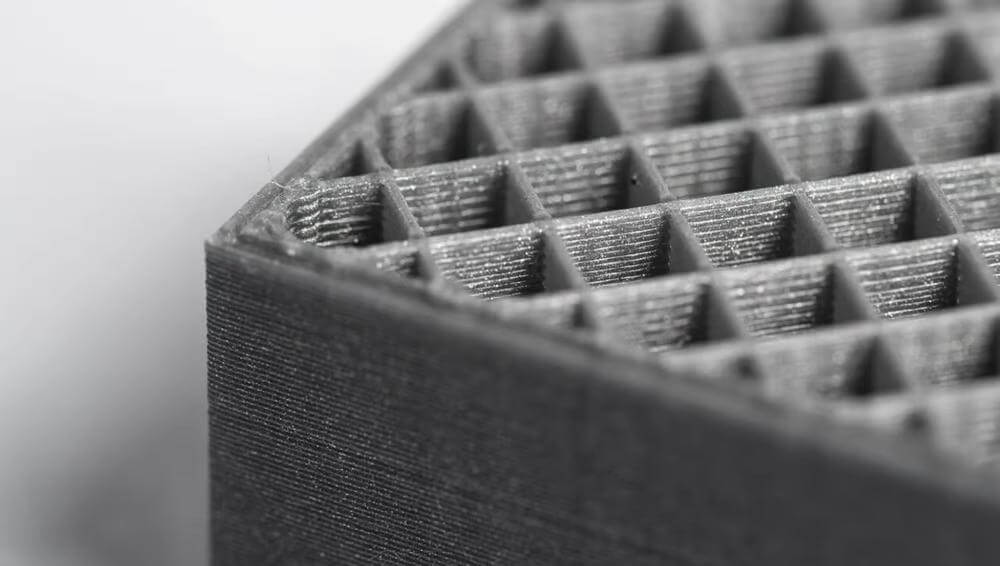
Grid / Grid /
Simplistic in nature, the mesh model consists of two sets of lines that intersect at the same point in each layer. The strength of the grid pattern comes from the intersection of the many lines in this pattern, which provides great support for the printed structure.
The Steam Labs test found a maximum compressive strength of 455.2 kilograms of force. CNC Kitchen found a tensile strength of about 50 kilo-force, with weight and print time similar to other models. In terms of compressive strength, they found that a small cube printed with the lattice pattern could withstand up to just over 350 kilograms of force along the Z axis and about 200 kilograms of force along the X and Y axes.
Straight (zig-zag) /Rectilinear (Zig-Zag)/
The rectilinear (zig-zag) pattern is similar to the grid pattern, but prints only one set of lines on each layer, reversing the line orientation each time. The strength of this rectilinear model comes from the alternating layer approach, which makes it harder to destroy the structure from one direction.
Steam Labs found this model to have a maximum compressive strength of 435.82 kilograms of force. The first test conducted by CNC Kitchen found a tensile strength of just under 50 kilograms of force, with an average print time and weight. As for the Z-axis force, as well as the X- and Y-axis, CNC Kitchen's second test found results of over 300 and nearly 200 kilograms of force, respectively.
Triangles / Triangles /
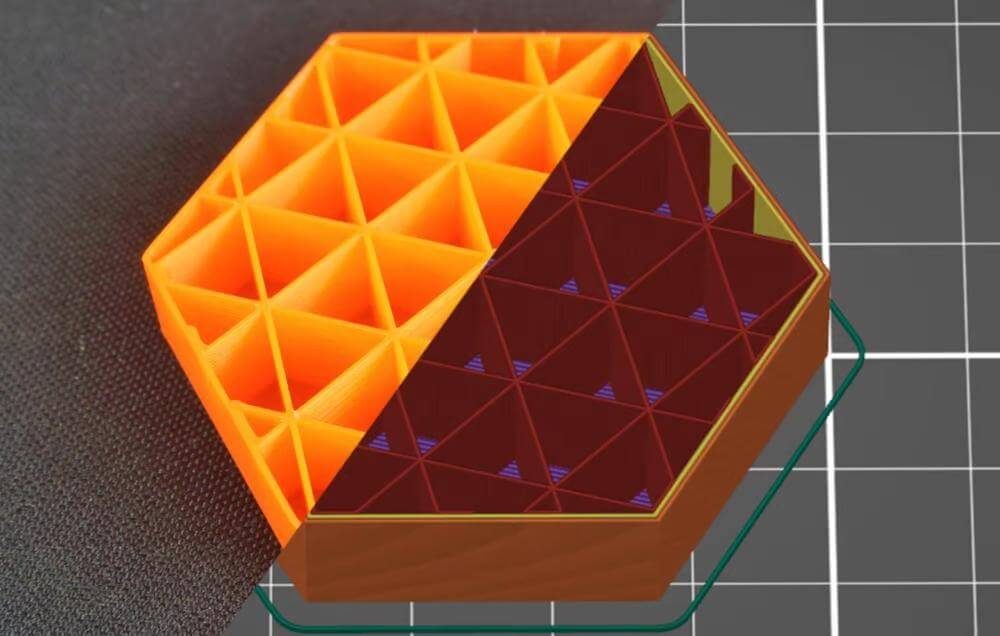
The triangle pattern is like the grid pattern, but instead of intersecting at right angles, this pattern creates 2D triangles that stack on each layer. The strength of this pattern comes from the fact that triangles are one of the strongest geometries in nature, as each side relies on the other two.
In the Steam Labs test, they found that this model has a maximum compressive strength of 379.94 kilograms of force. CNC Kitchen's first study determined a tensile strength of 13 kilograms of force. This test also found a fairly normal print time, but quite a heavy weight. The second CNC Kitchen test results revealed a compressive strength of about 350 and 240 kilograms of force along the Z axis as well as the X and Y axes, respectively.
Cubic / Cubic /
The cube-fill pattern generates diagonally stacked cubes resembling regular and inverted pyramids when printed. The cubic pattern provides three-dimensional strength due to the structural integrity of the intersecting triangles involved.
Unfortunately, Steam Labs did not test this filling option, and it is also not included in the first CNC Kitchen test. Fortunately, it has been tested in the second CNC Kitchen test. The cubic model has similar compressive strength in all three axes, about 250 kilograms of force. This test also found that the cube model took significantly longer to print, with the 125% having a normalized print time and model weight similar to most other models, if not less.
Honeycomb / Honeycomb /
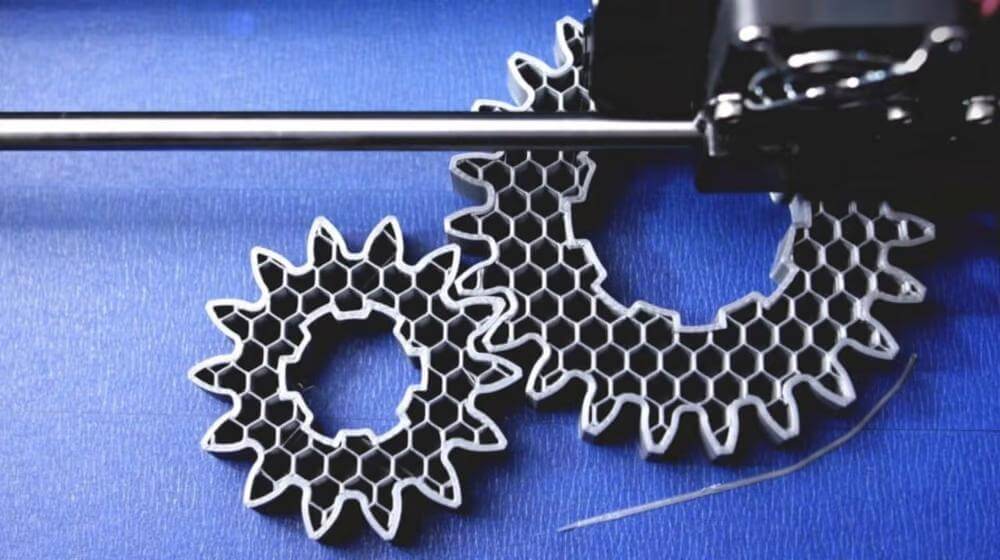
The honeycomb pattern copies the general shape of a honeycomb and repeats the small hexagonal 2D structures in the pattern area. The strength of this pattern comes from the alternating interweaving of solid geometric shapes.
In the Steam Labs test, the honeycomb filling model ranked second in maximum compressive strength, withstanding 430.75 kilograms of force. CNC Kitchen's first test of the full honeycomb model found its tensile strength to be over 12 kilograms of force, with a slightly low weight.
CNC Kitchen's second test also found a compressive strength of just under 350 kilograms of force in the Z axis and 200 kilograms of force in the X and Y axes. It's also worth mentioning that CNC Kitchen's second test found that the fill pattern of honeycomb has a super high percentage normalized print time of 310%. This unusually high print time is due to the constant change in direction involved in printing a honeycomb pattern.
Gyroid
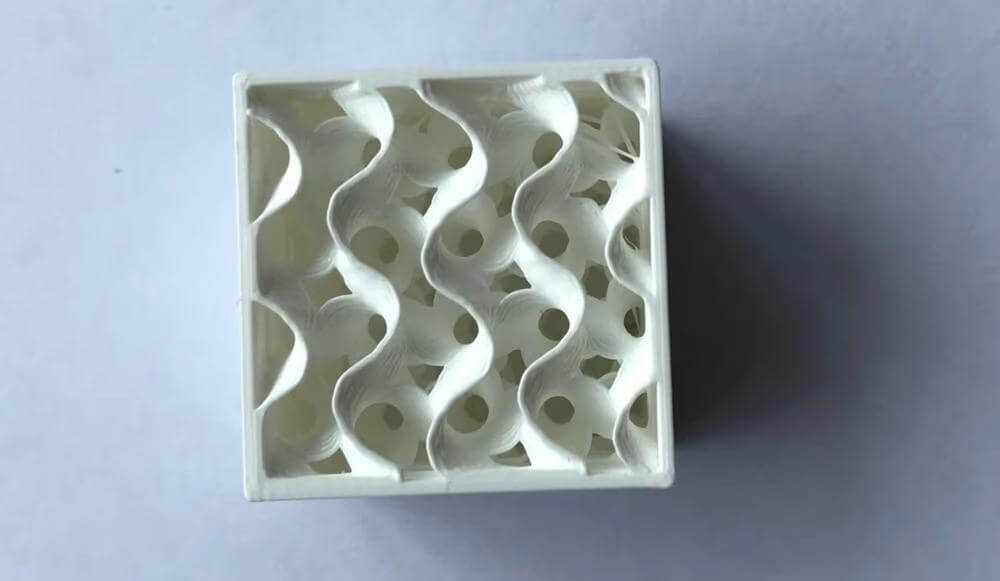
Finally, the gyroid fill pattern is the coolest. It uses repeating mathematically calculated curves arranged in an unusual way. The strength of this model comes from the overlap between the curves of every three layers (depending on the slice) and the mathematical nature of the shape of the curve.
Although not included in the first CNC Kitchen or Steam Labs test, this model was tested in the second CNC Kitchen test. The test found that the gyroid filling model has a compressive strength of 264 kilograms of force on all three axes, meaning that the model offers equal force in all directions. CNC Kitchen's second test also found the fill pattern to have a normalized print time of 125% (not too bad) and about average weight.
License: The text of "The Strongest Fill Model for Your 3D Prints" by All3DP is licensed under a Creative Commons Attribution 4.0 International License.
0 Comments